Show a Different Checkbox for Each Product
How to show different agreement checkboxes for different products with Checkbox Assistant: use Group Mode, add one checkbox per product, and set its display conditions.
With Group Mode you can show different terms for different products, for example terms A on product A and terms B on product B. Each checkbox has its own display conditions, so you add one checkbox per set of terms and tell each one which products it belongs to.
💡 Group Mode is an Advanced plan feature. It cannot be selected on the Free or Starter plan, so change your plan first from “Plan” in the left navigation of the app.
You can register up to 10 checkboxes per setting.
For how to open the checkbox setup screen, see Add Checkboxes to the Product Page, Cart Page, and Cart Drawer.
1. Set the checkbox type to Group Mode
On the checkbox setup screen, set Checkbox Type to “Group Mode (multiple checkboxes)”.
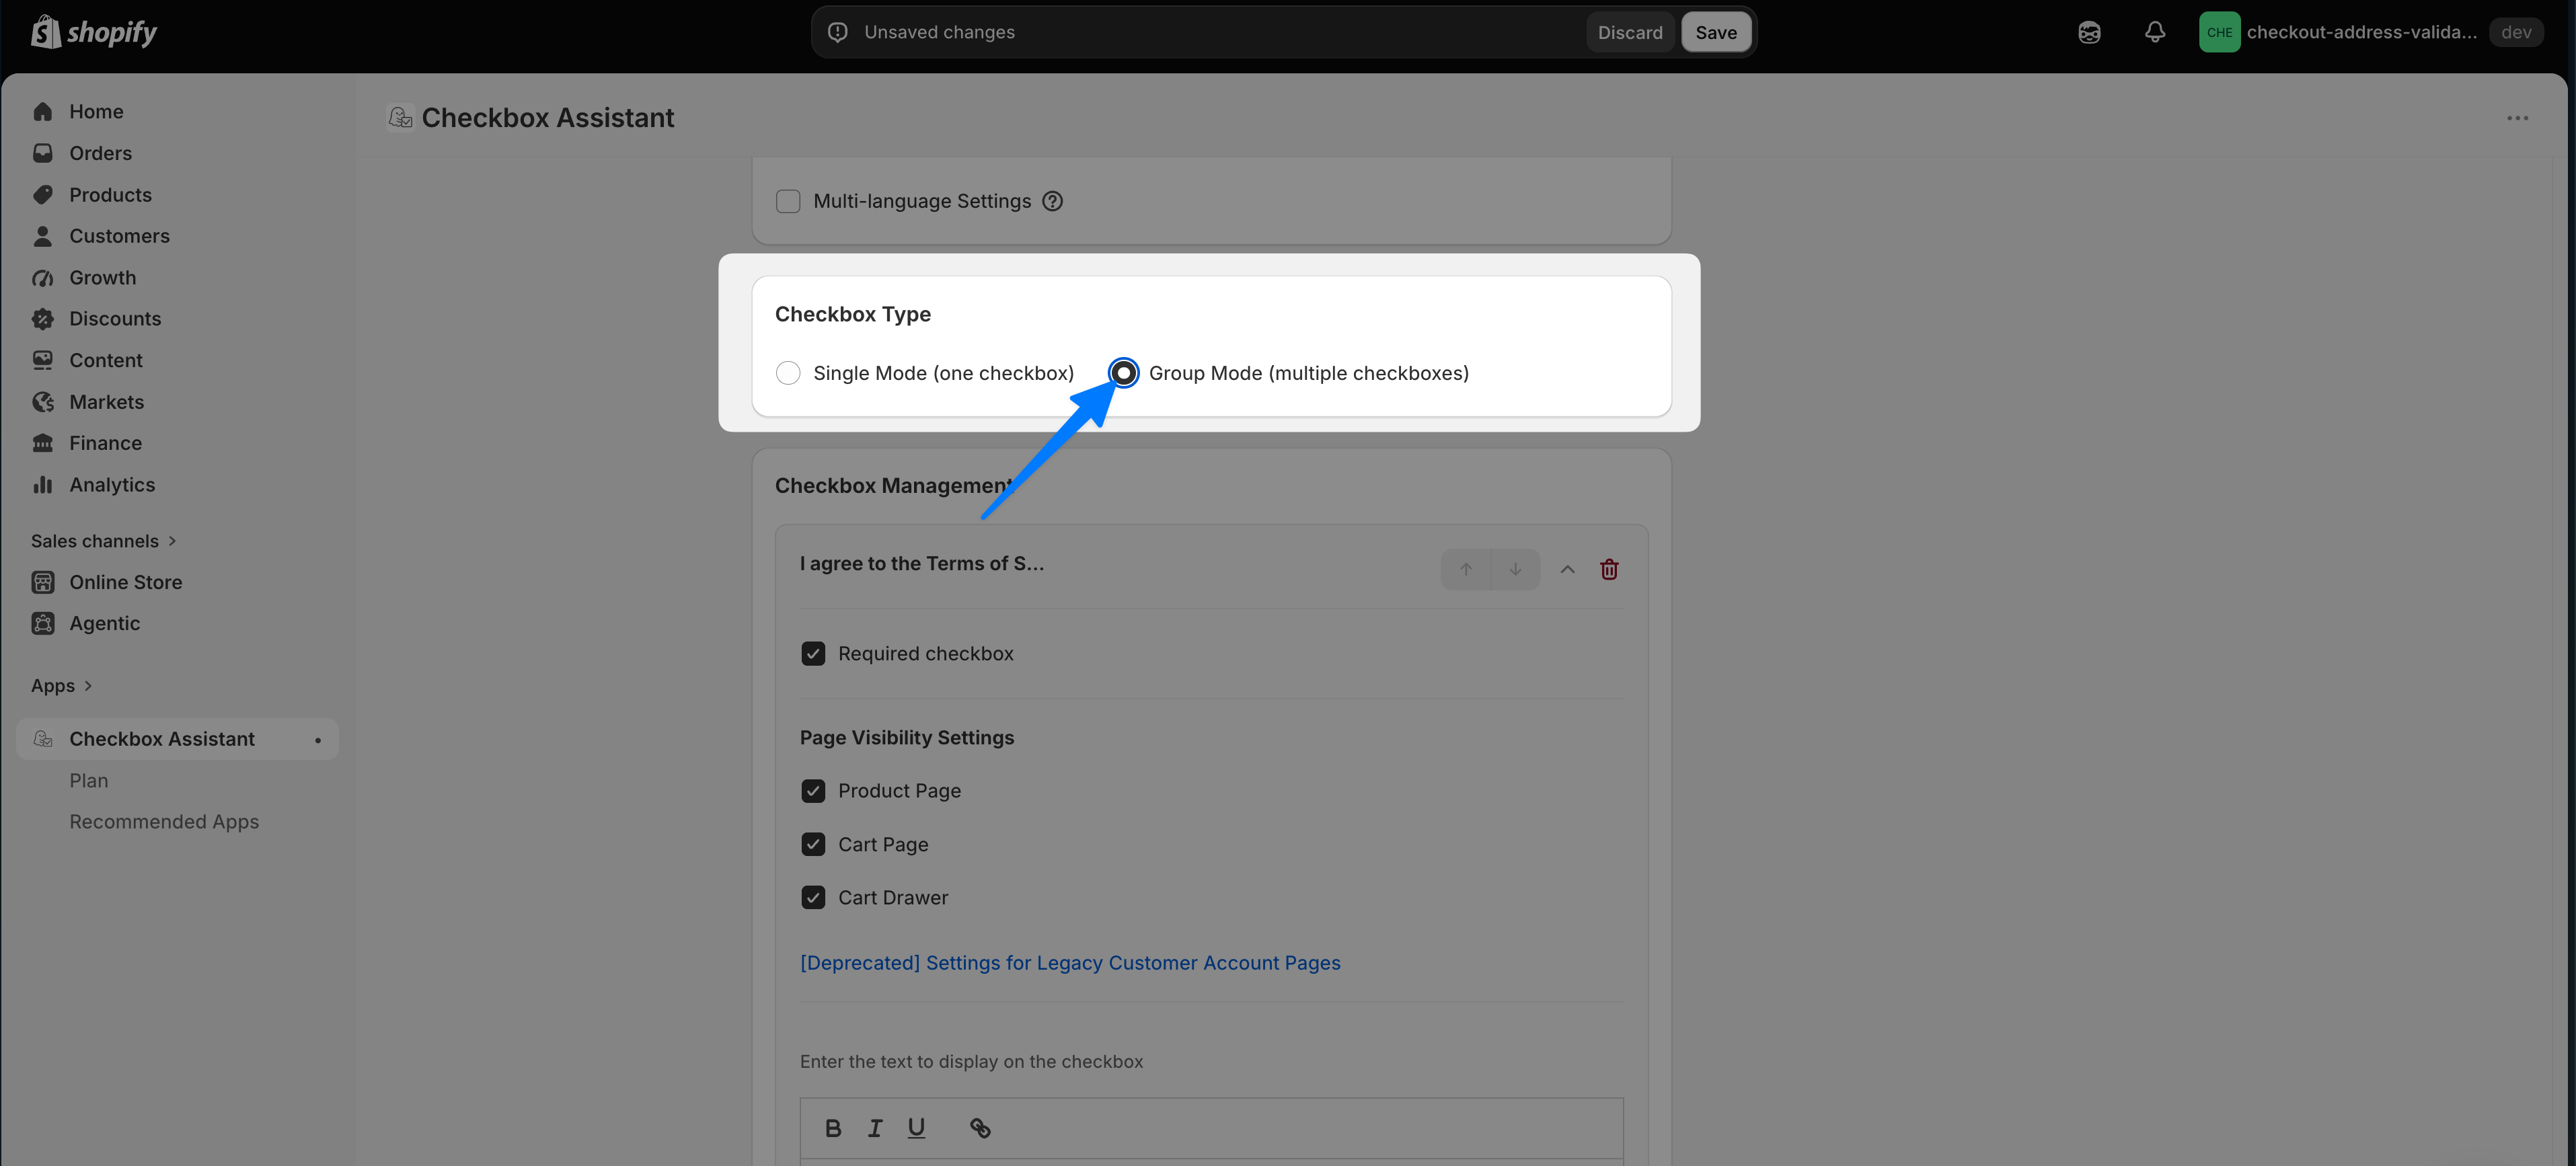
2. Add the checkbox for product A
In the steps below, product A is The 3p Fulfilled Snowboard and product B is The Collection Snowboard: Liquid.
Under Checkbox Management, click “Add Checkbox”, then enter the text you want to show for product A.
Page Visibility Settings
A newly added checkbox is not shown on any page yet. In Page Visibility Settings, check the pages you want it to appear on: Product Page, Cart Page, or Cart Drawer.
💡 If you skip this, the checkbox will not appear in your store even when the display conditions are set correctly.
Individual display conditions
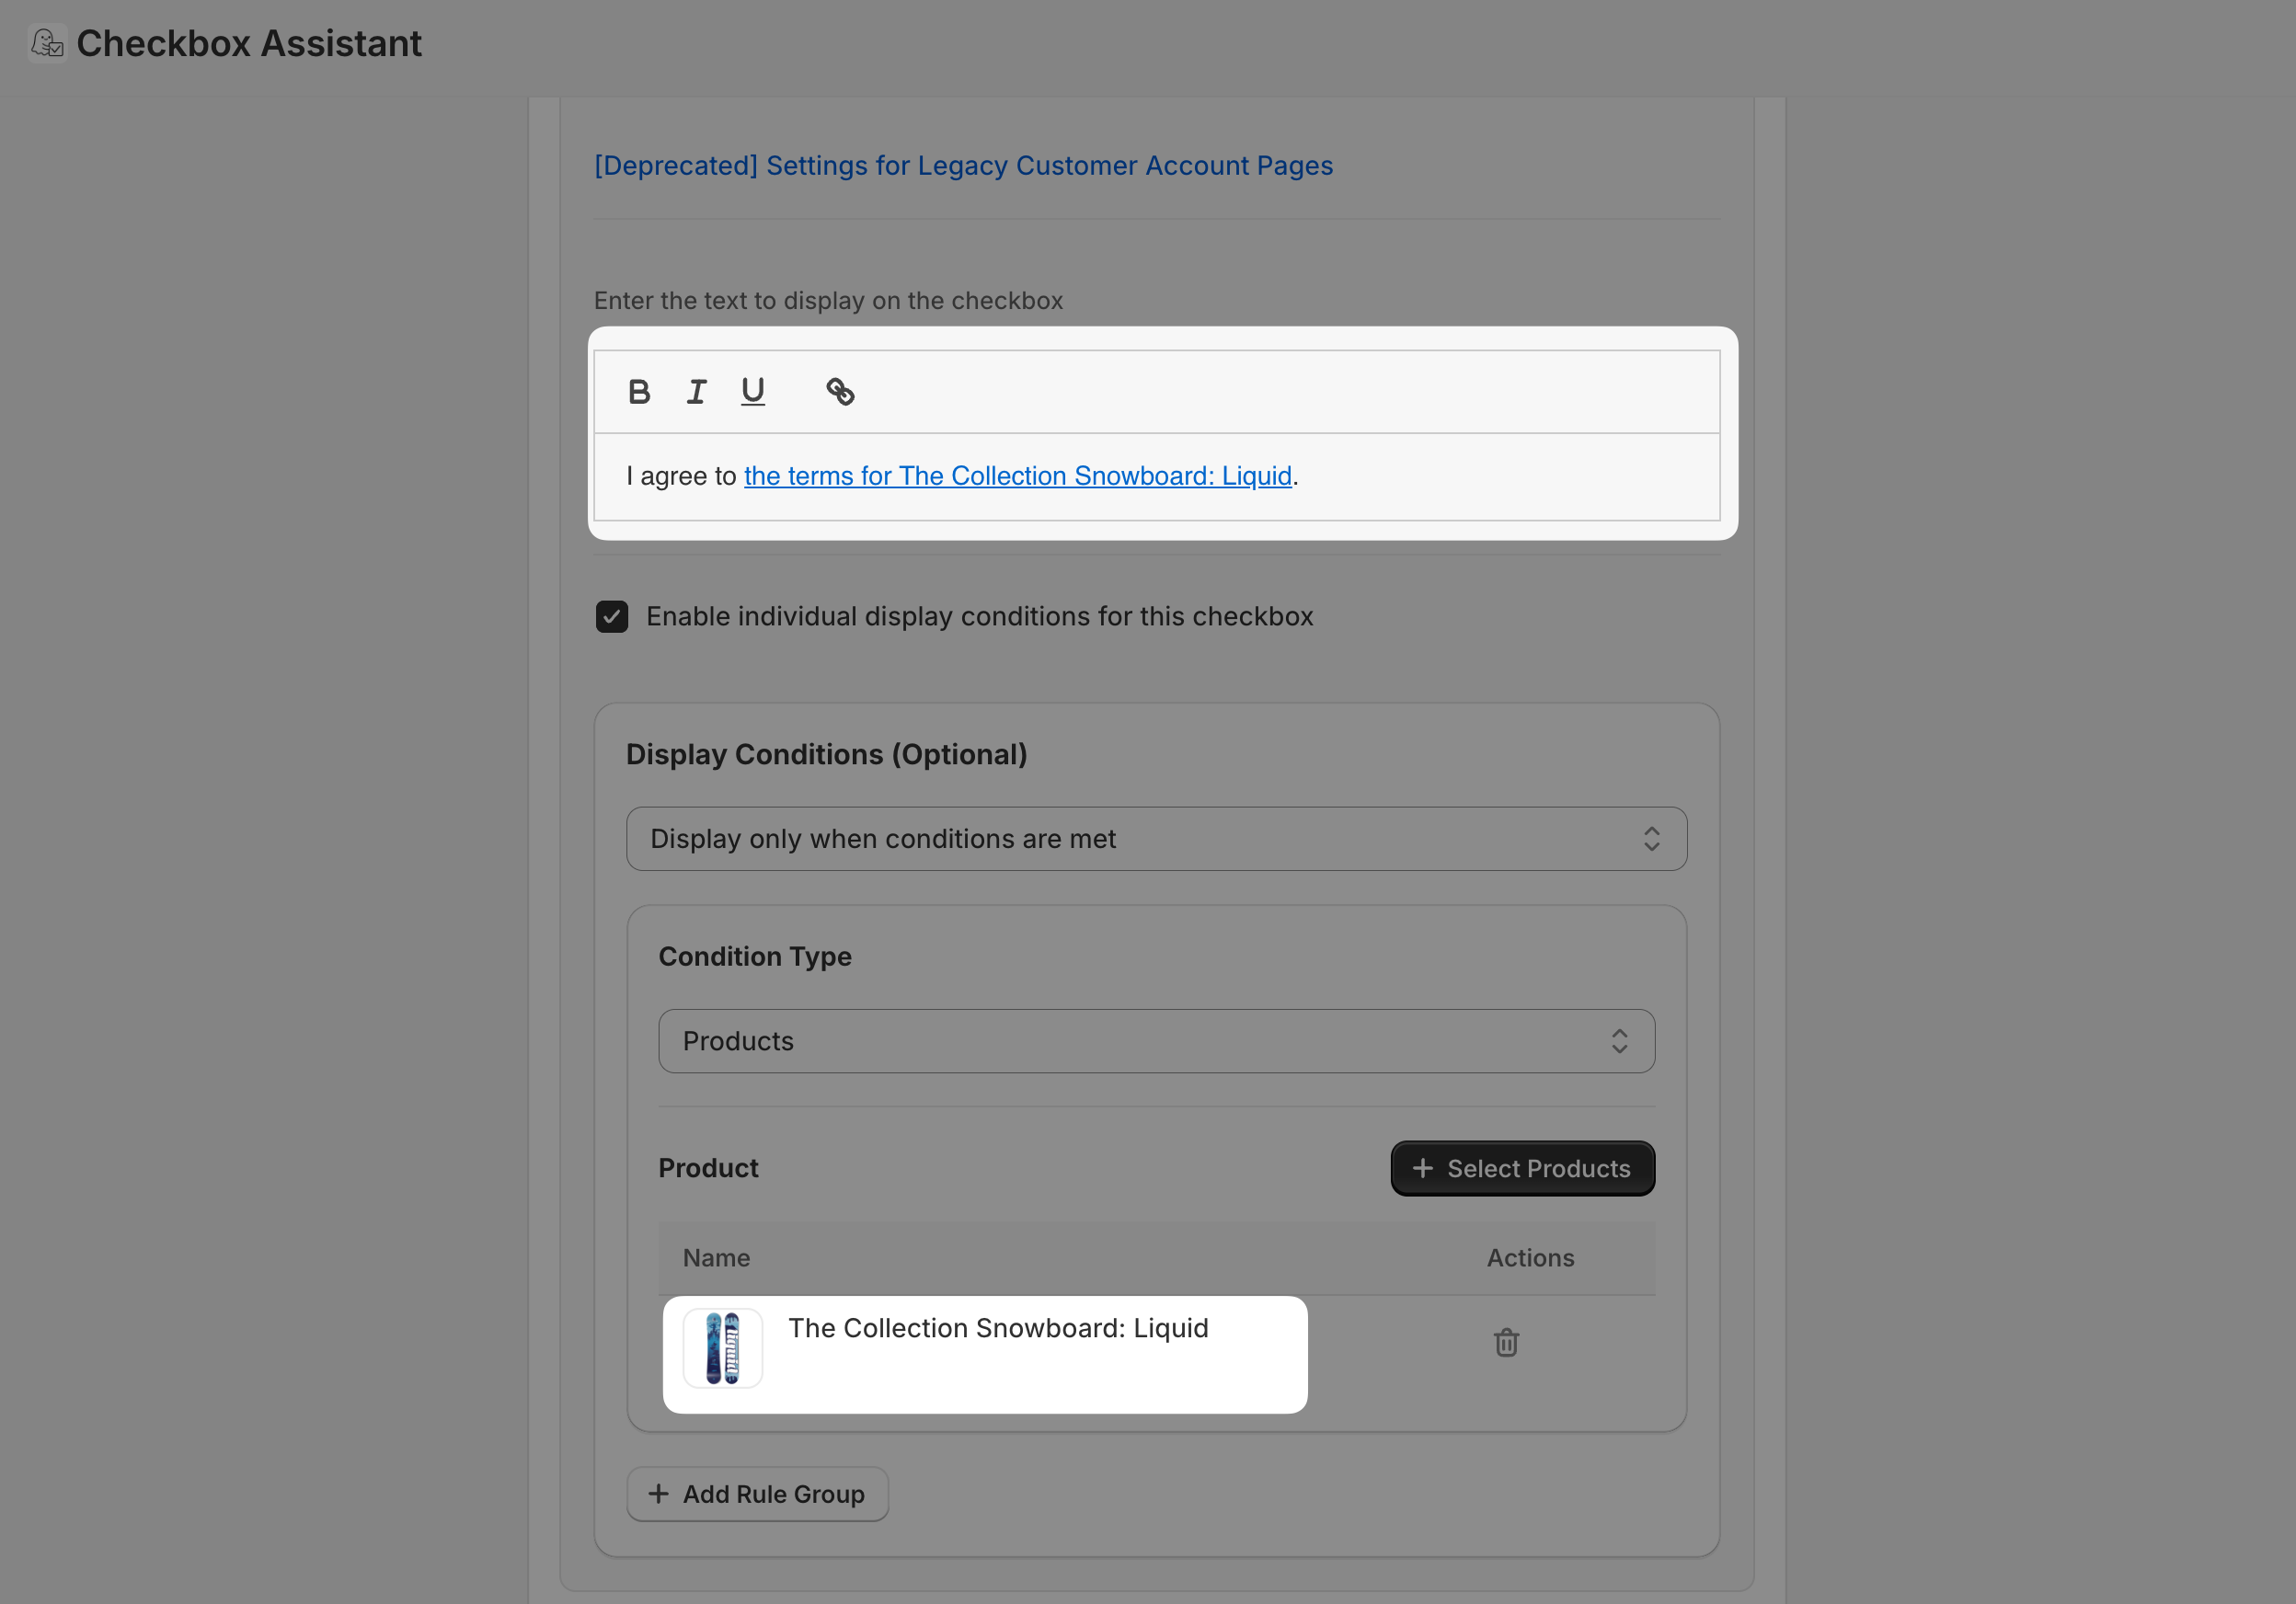
Check “Enable individual display conditions for this checkbox” to set conditions that apply to this checkbox only. Set Condition Type to Products, then click “Select Products” and choose product A.
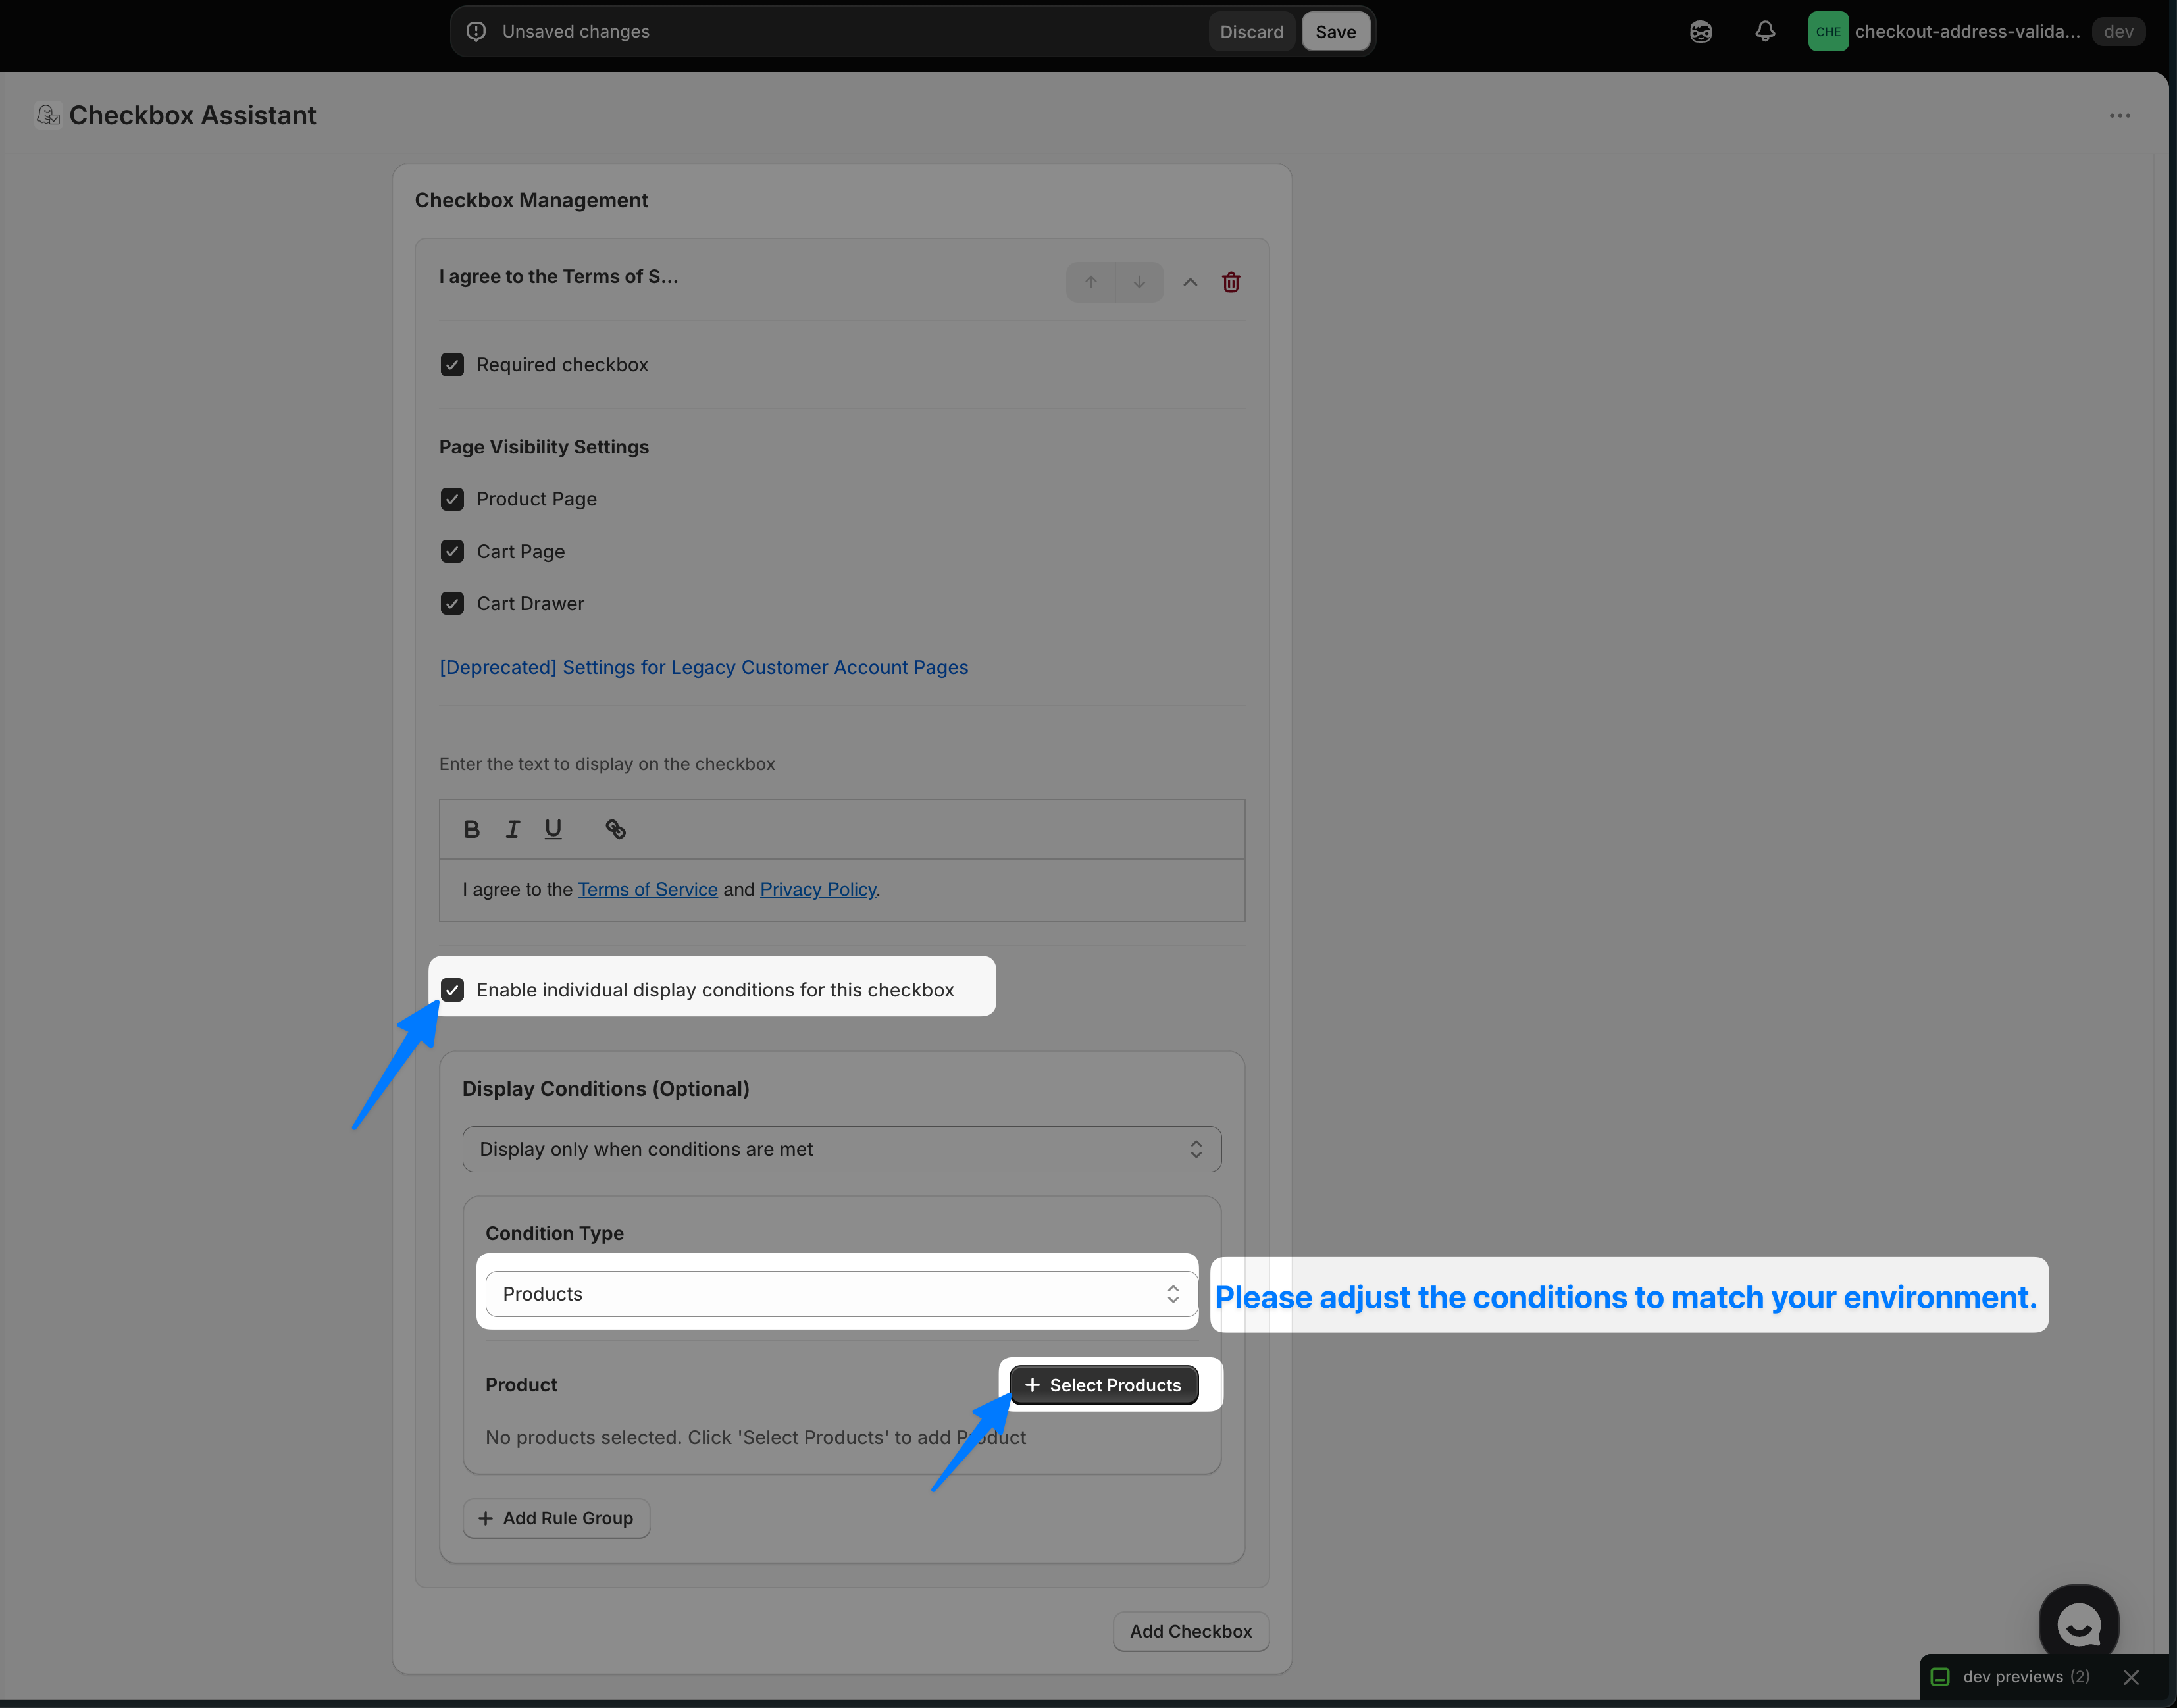
You write the checkbox text yourself. Here it is set to “I agree to the terms for The 3p Fulfilled Snowboard.” with the same product chosen as the display condition, so this text appears only on that product’s page.
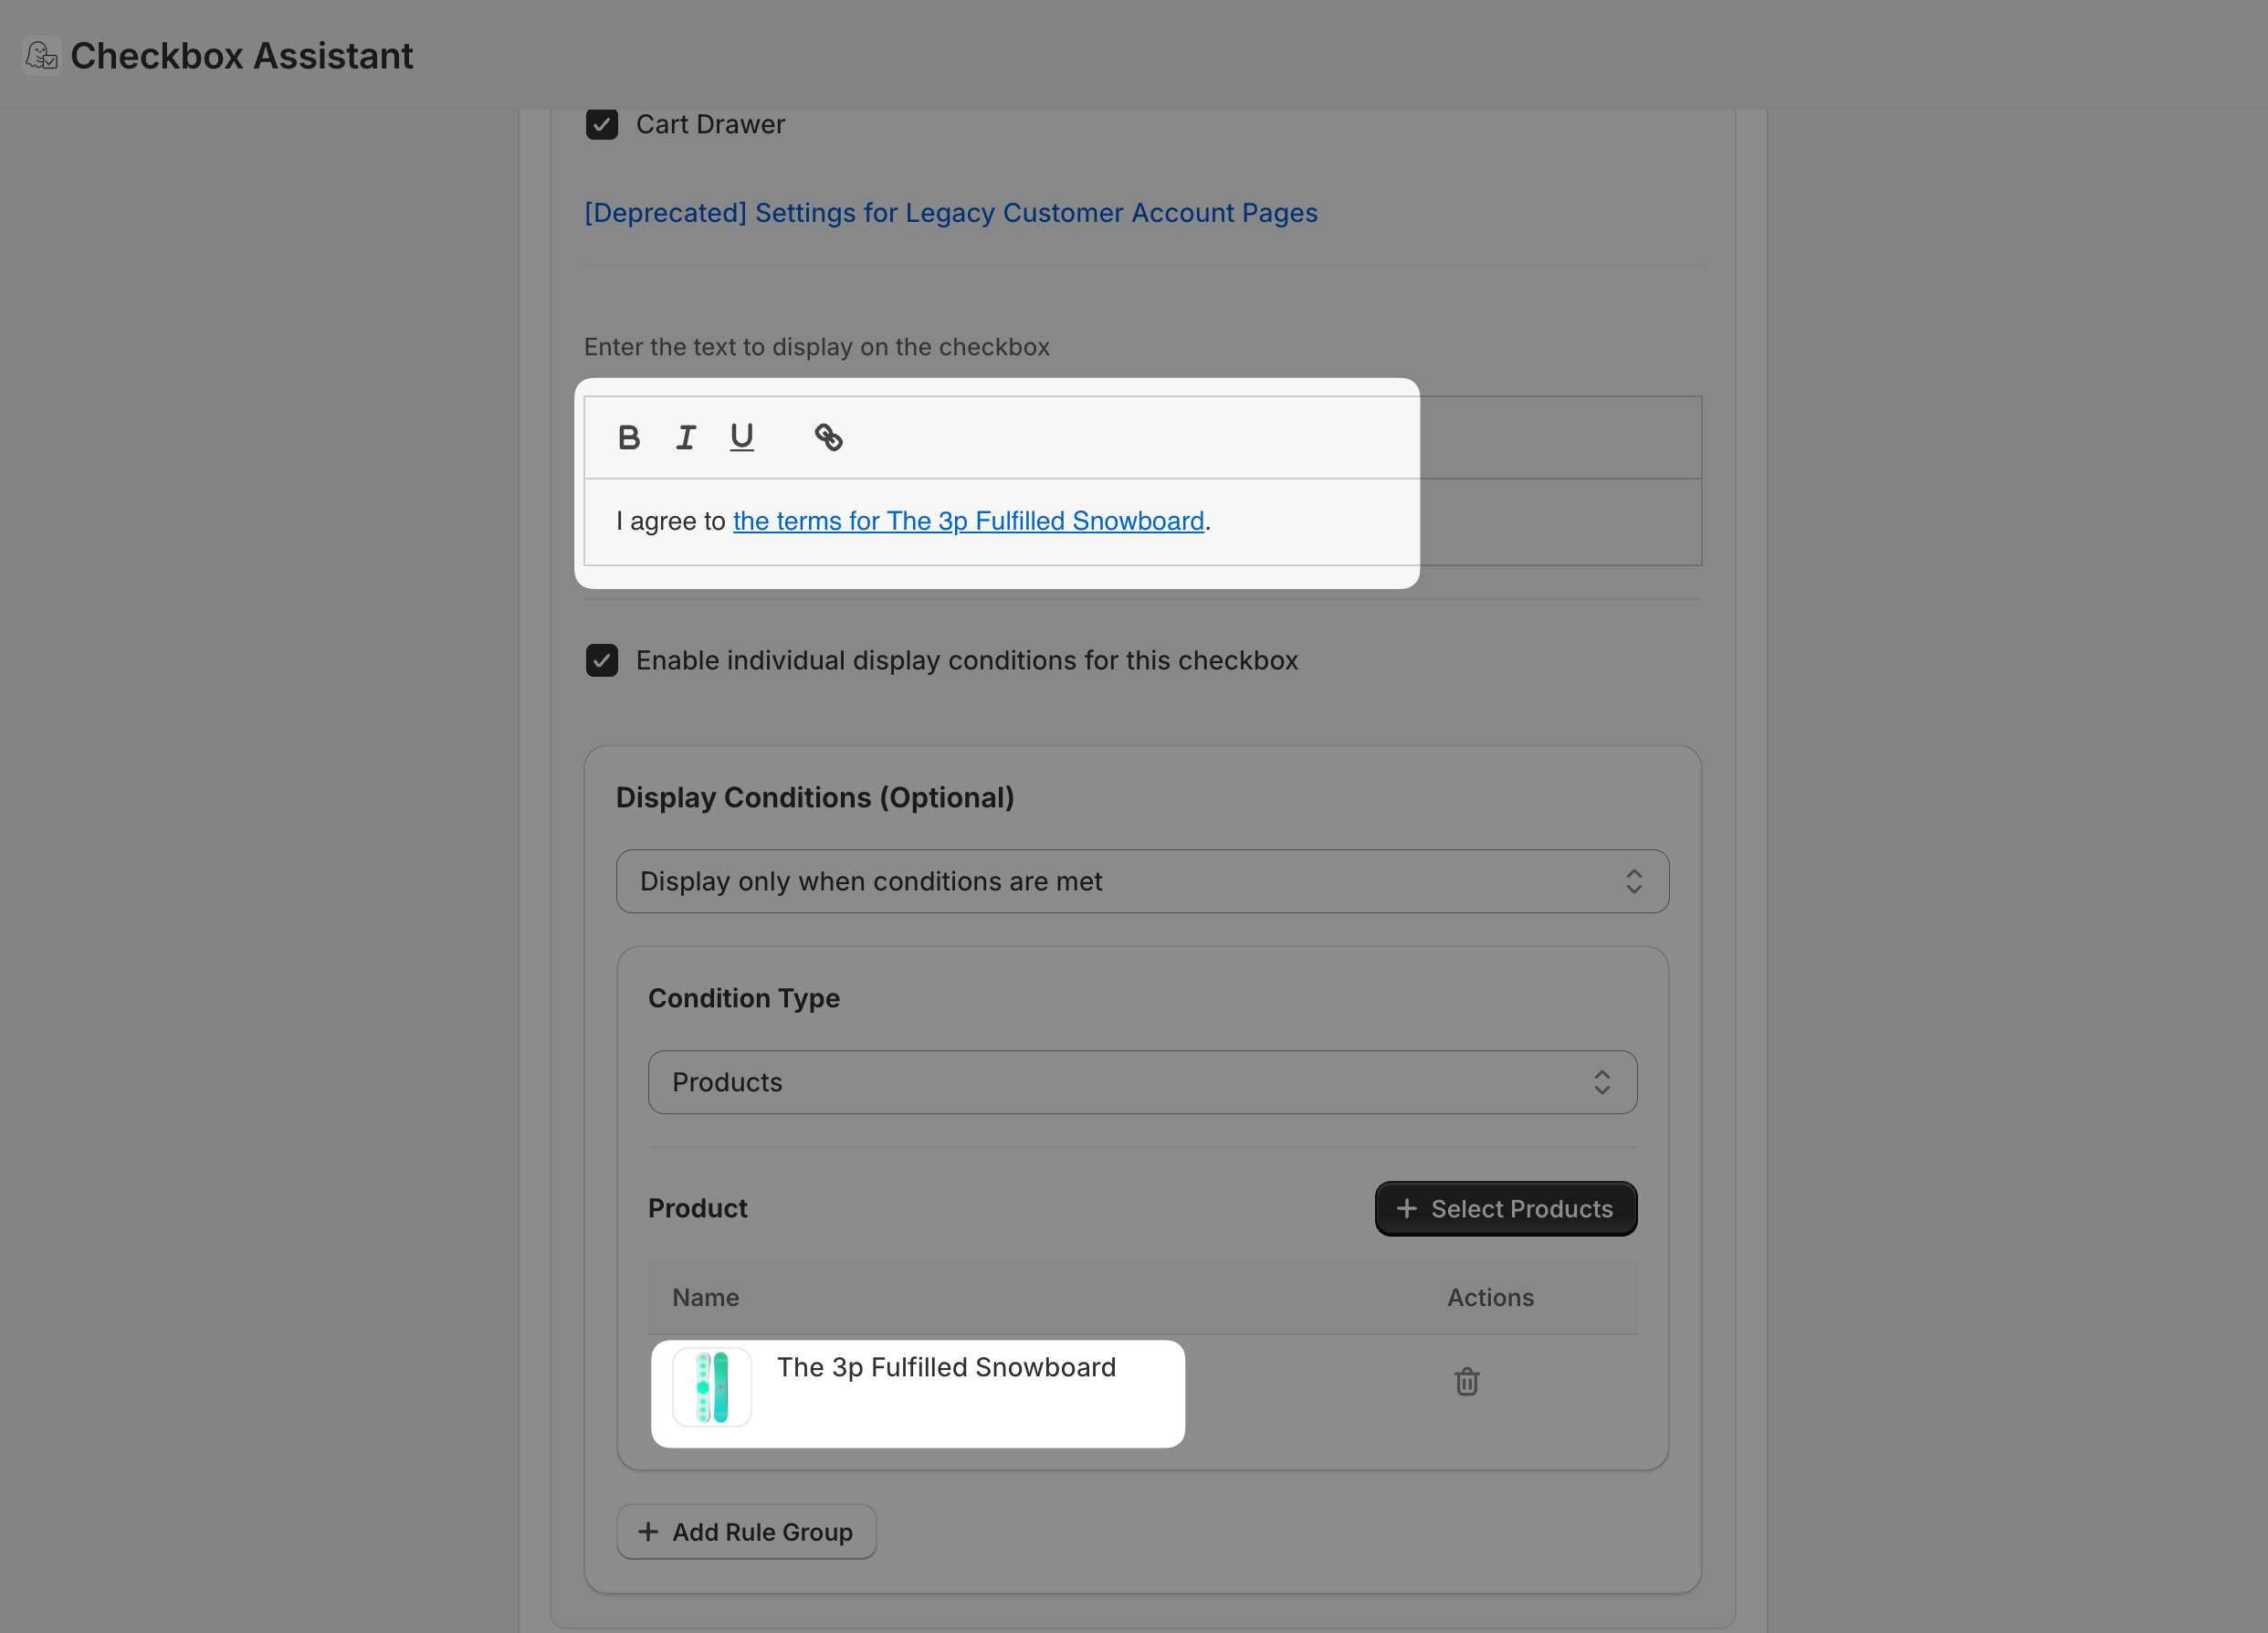
Besides products, you can also target variants, product tags, customer tags, and markets. If many products need the same checkbox, a product tag is easier to manage than selecting products one by one.
3. Add the checkbox for product B
Click “Add Checkbox” at the bottom of the card to add a second checkbox.
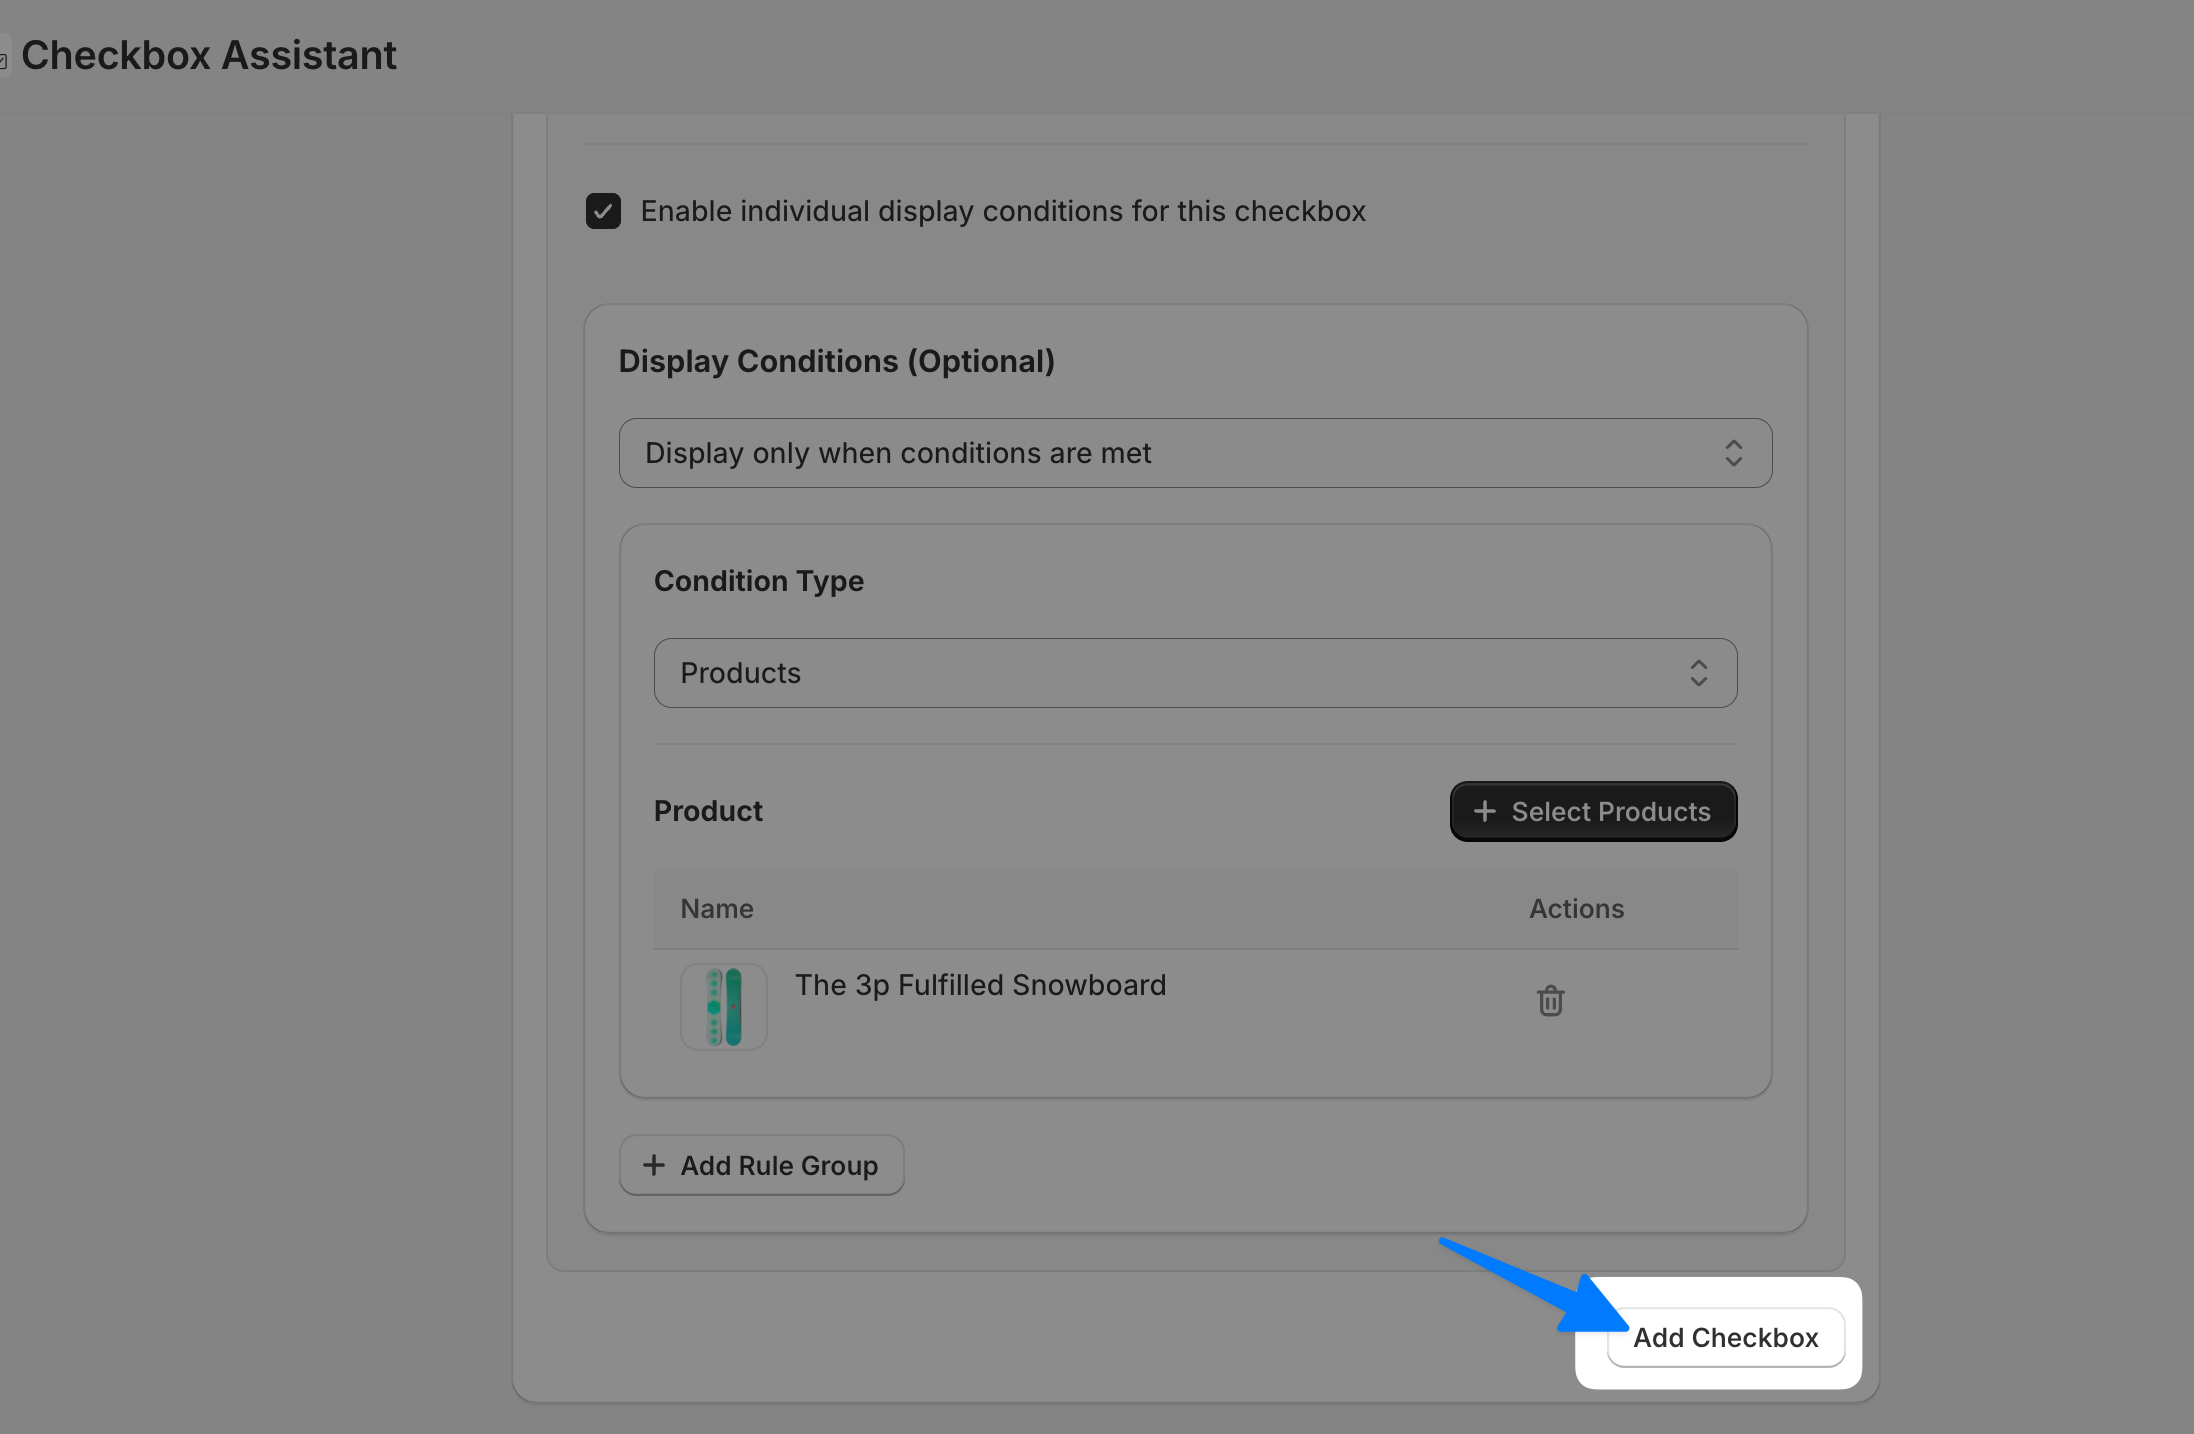
Enter the text and the display condition for product B on the new checkbox, in the same way as in step 2.
4. Save and confirm the result in the Theme Editor
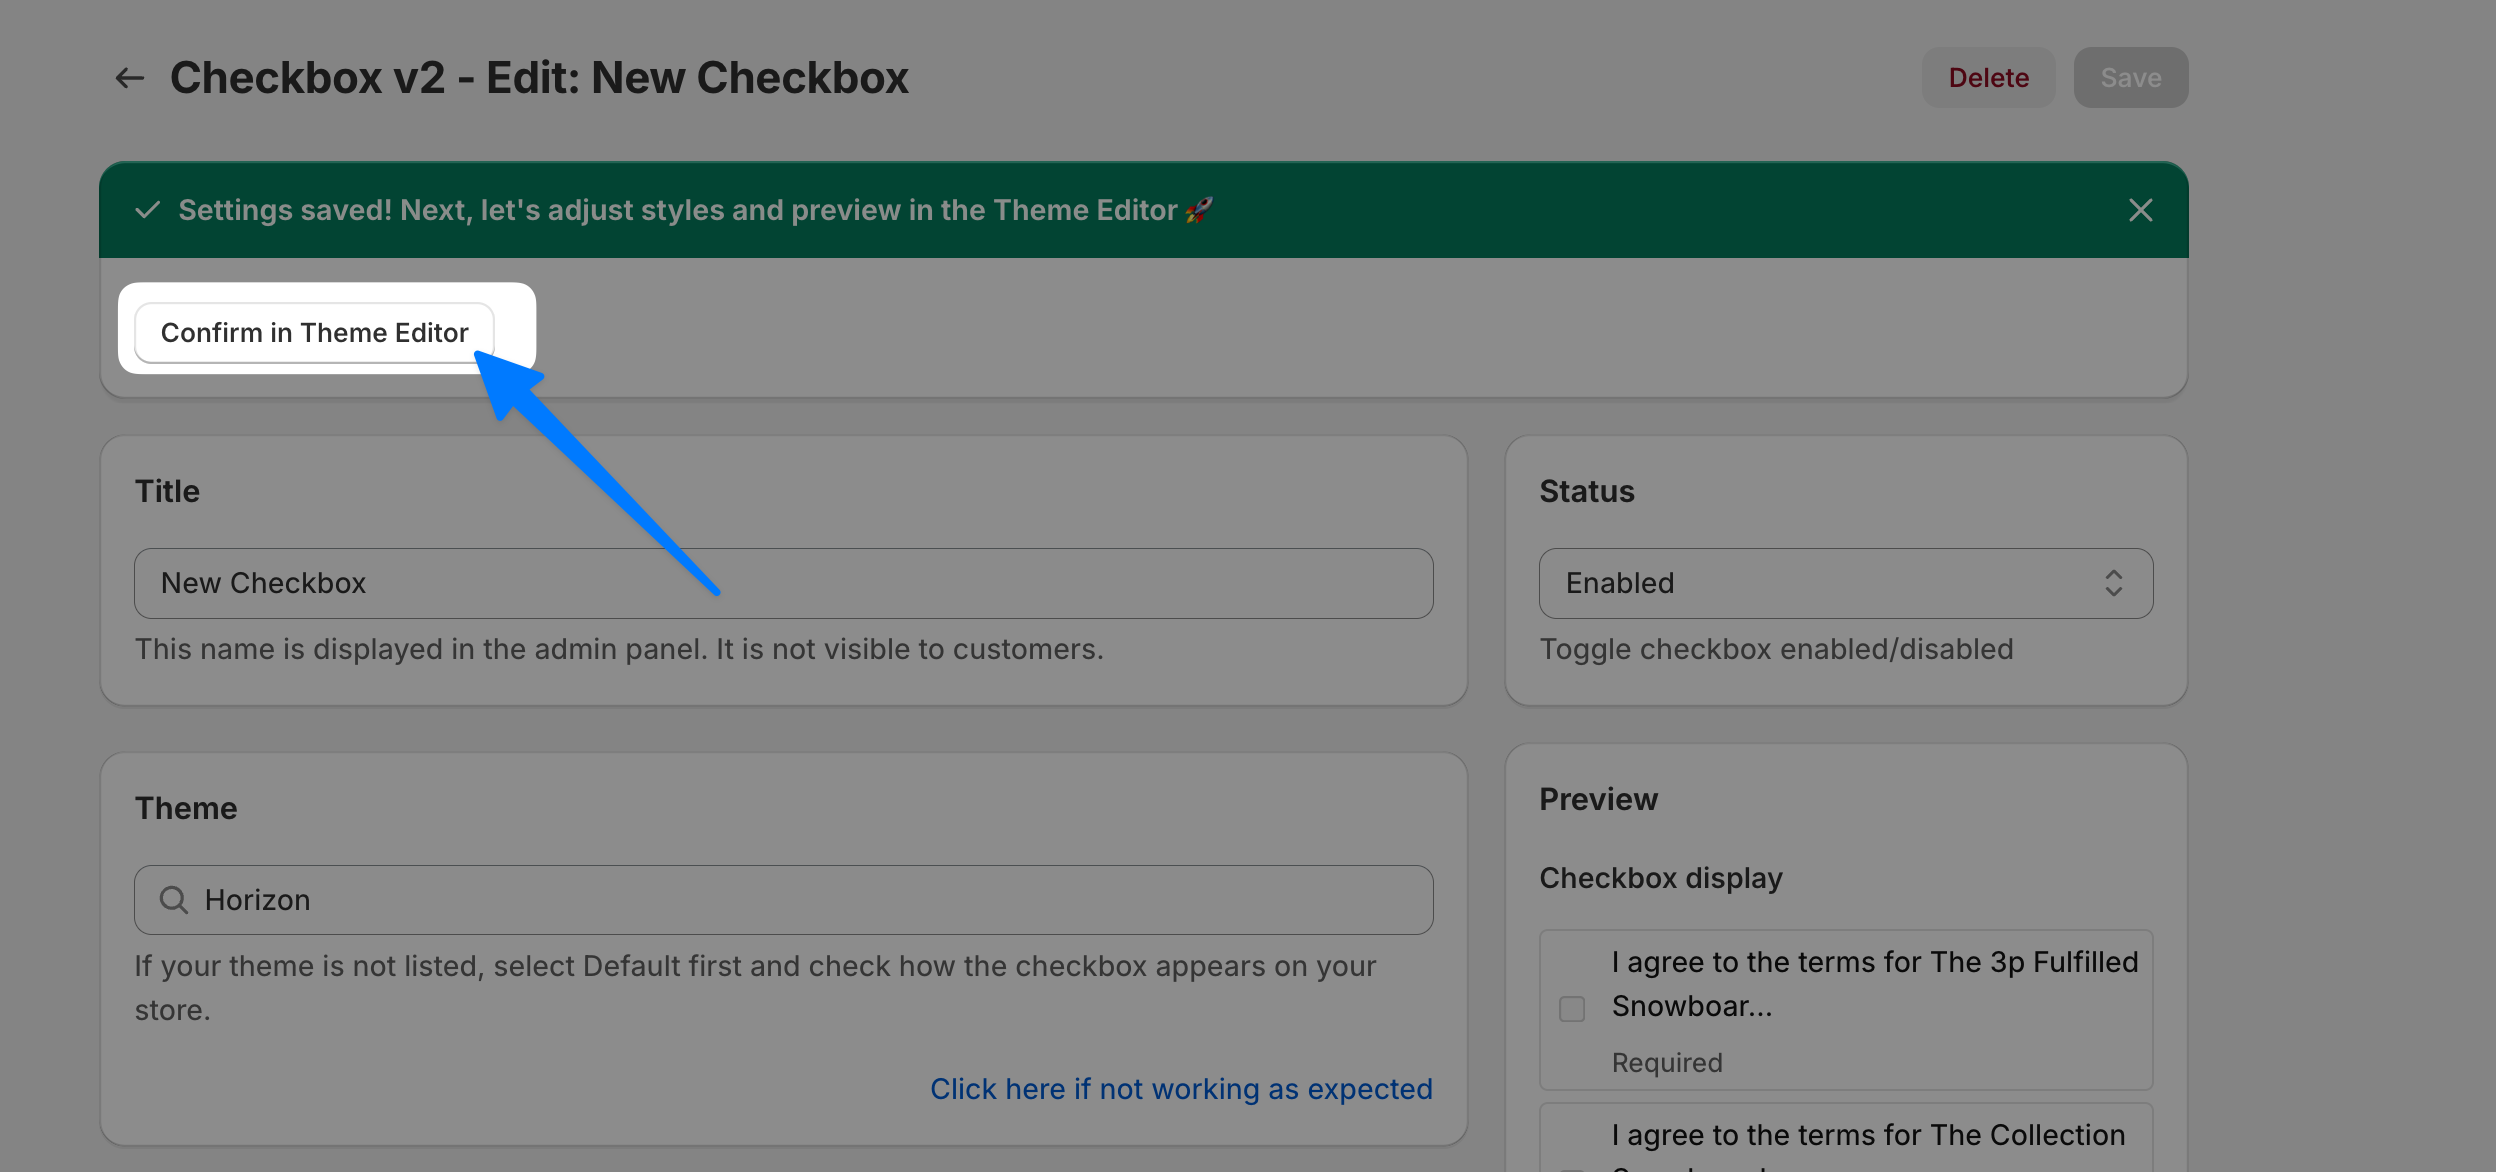
Click Save at the top right of the app. After saving, the preview on the right lists the checkboxes you registered. Check them, then click “Confirm in Theme Editor” to see how they look in your store.
How the checkboxes appear
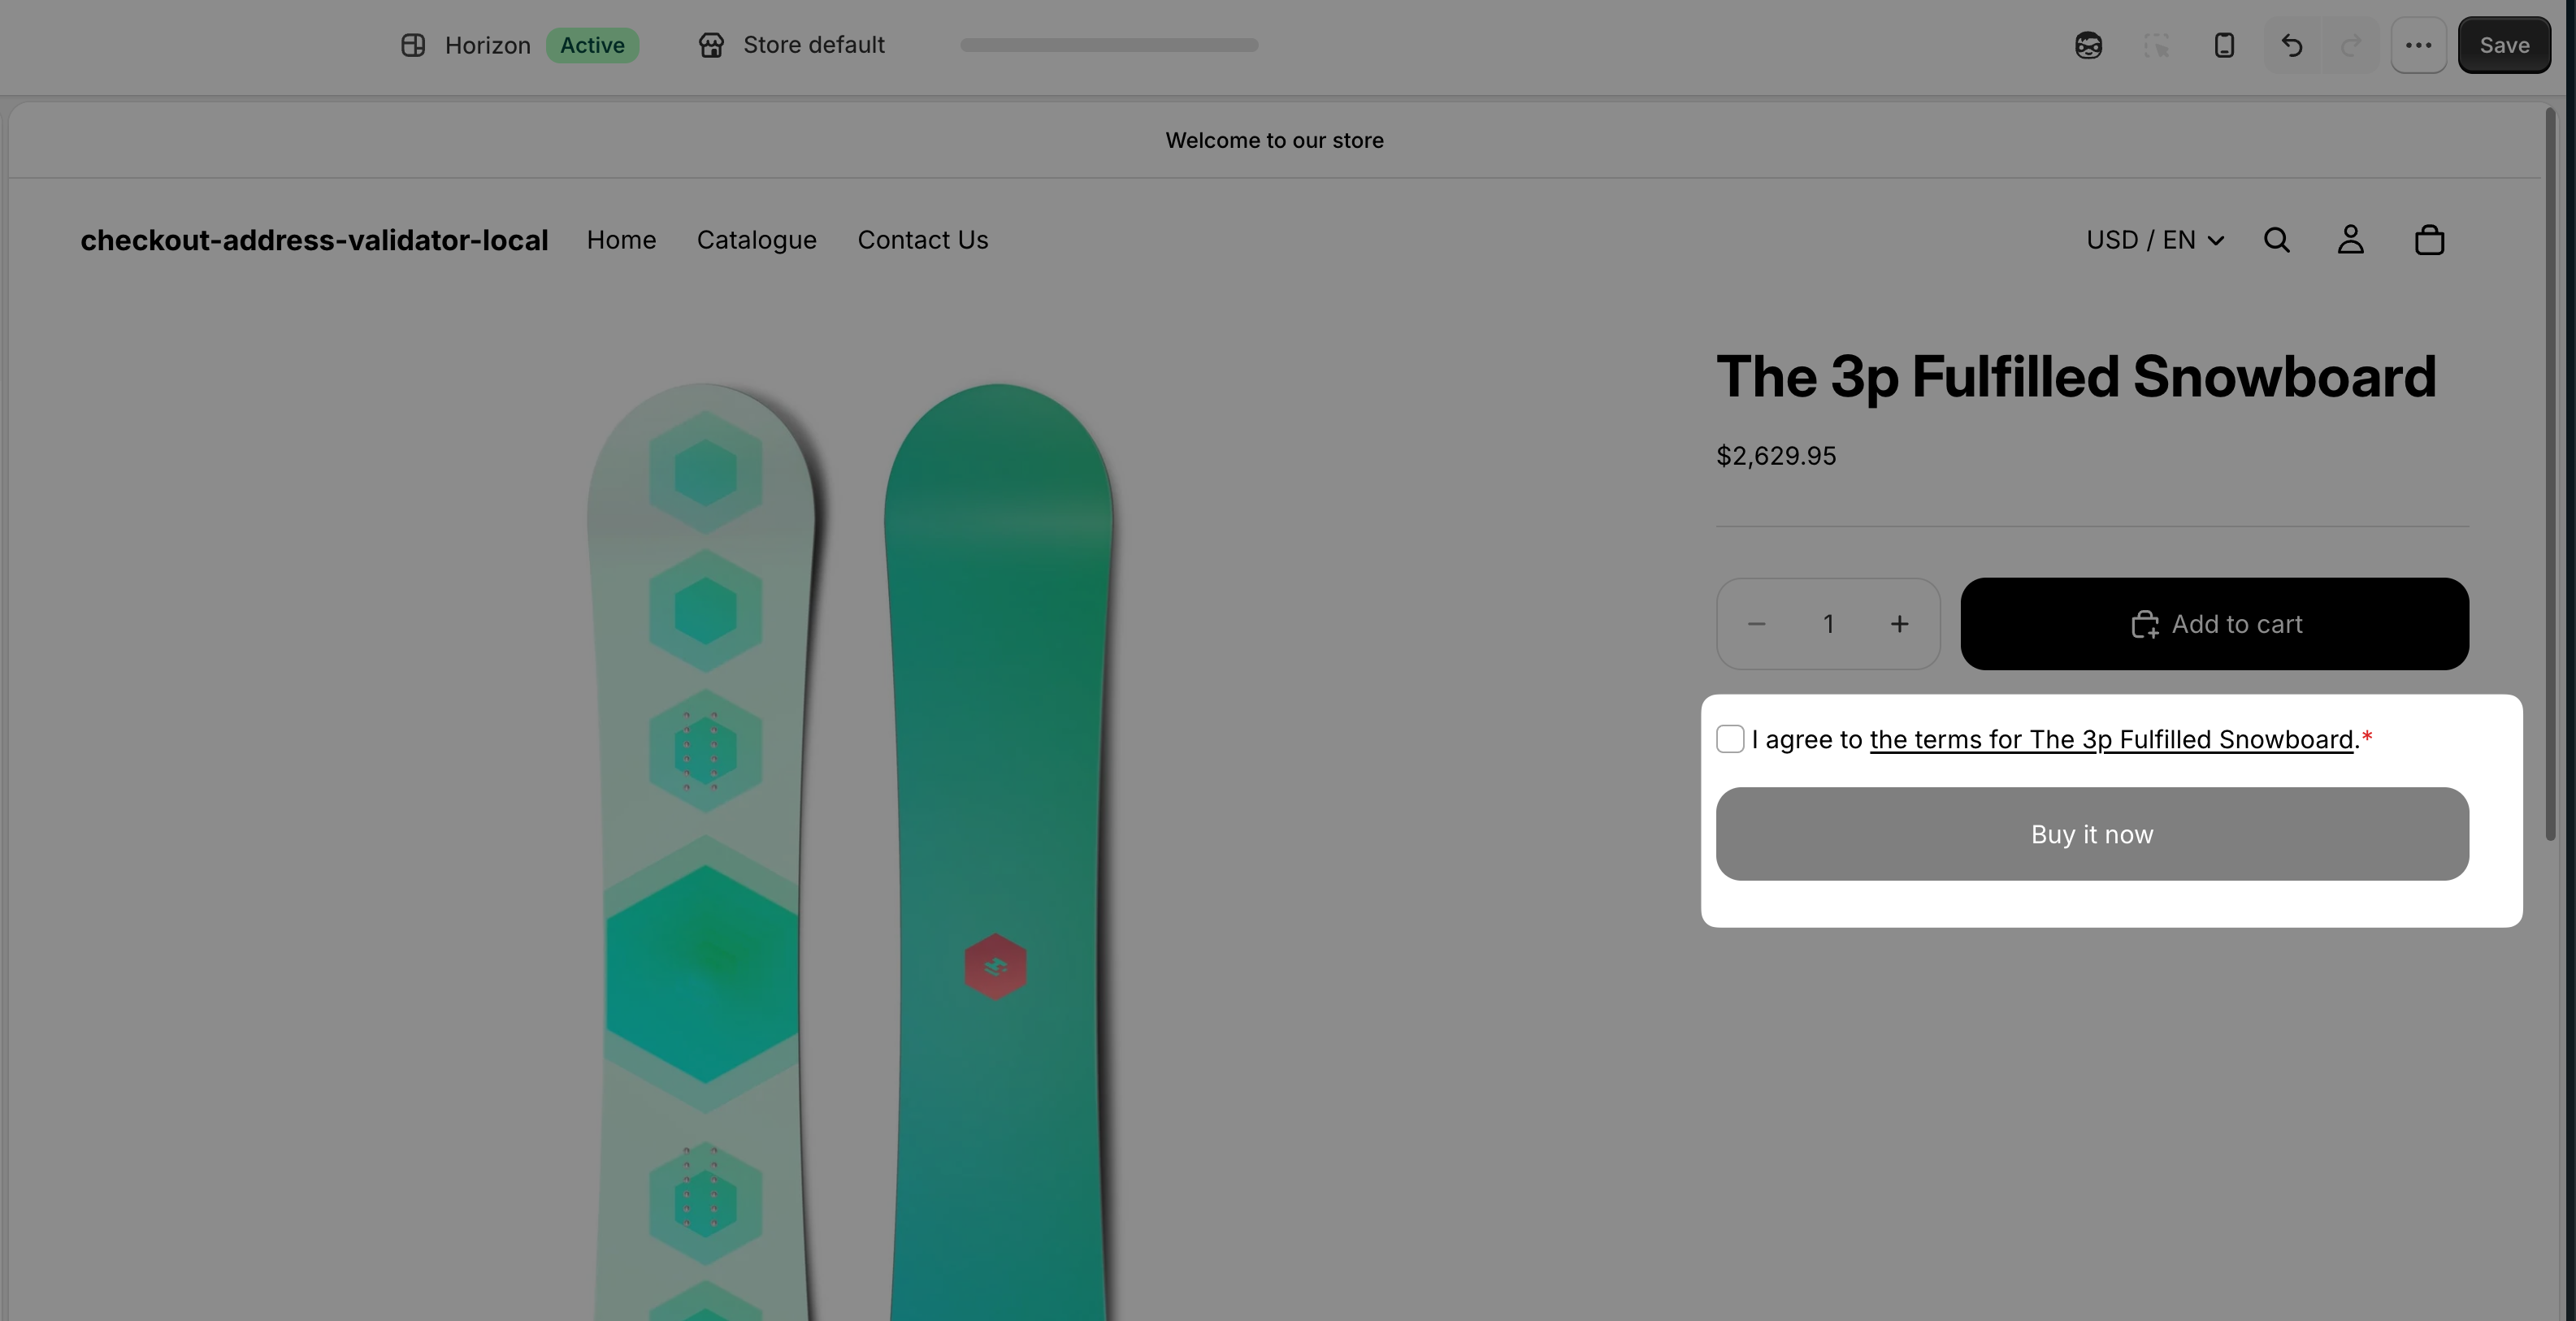
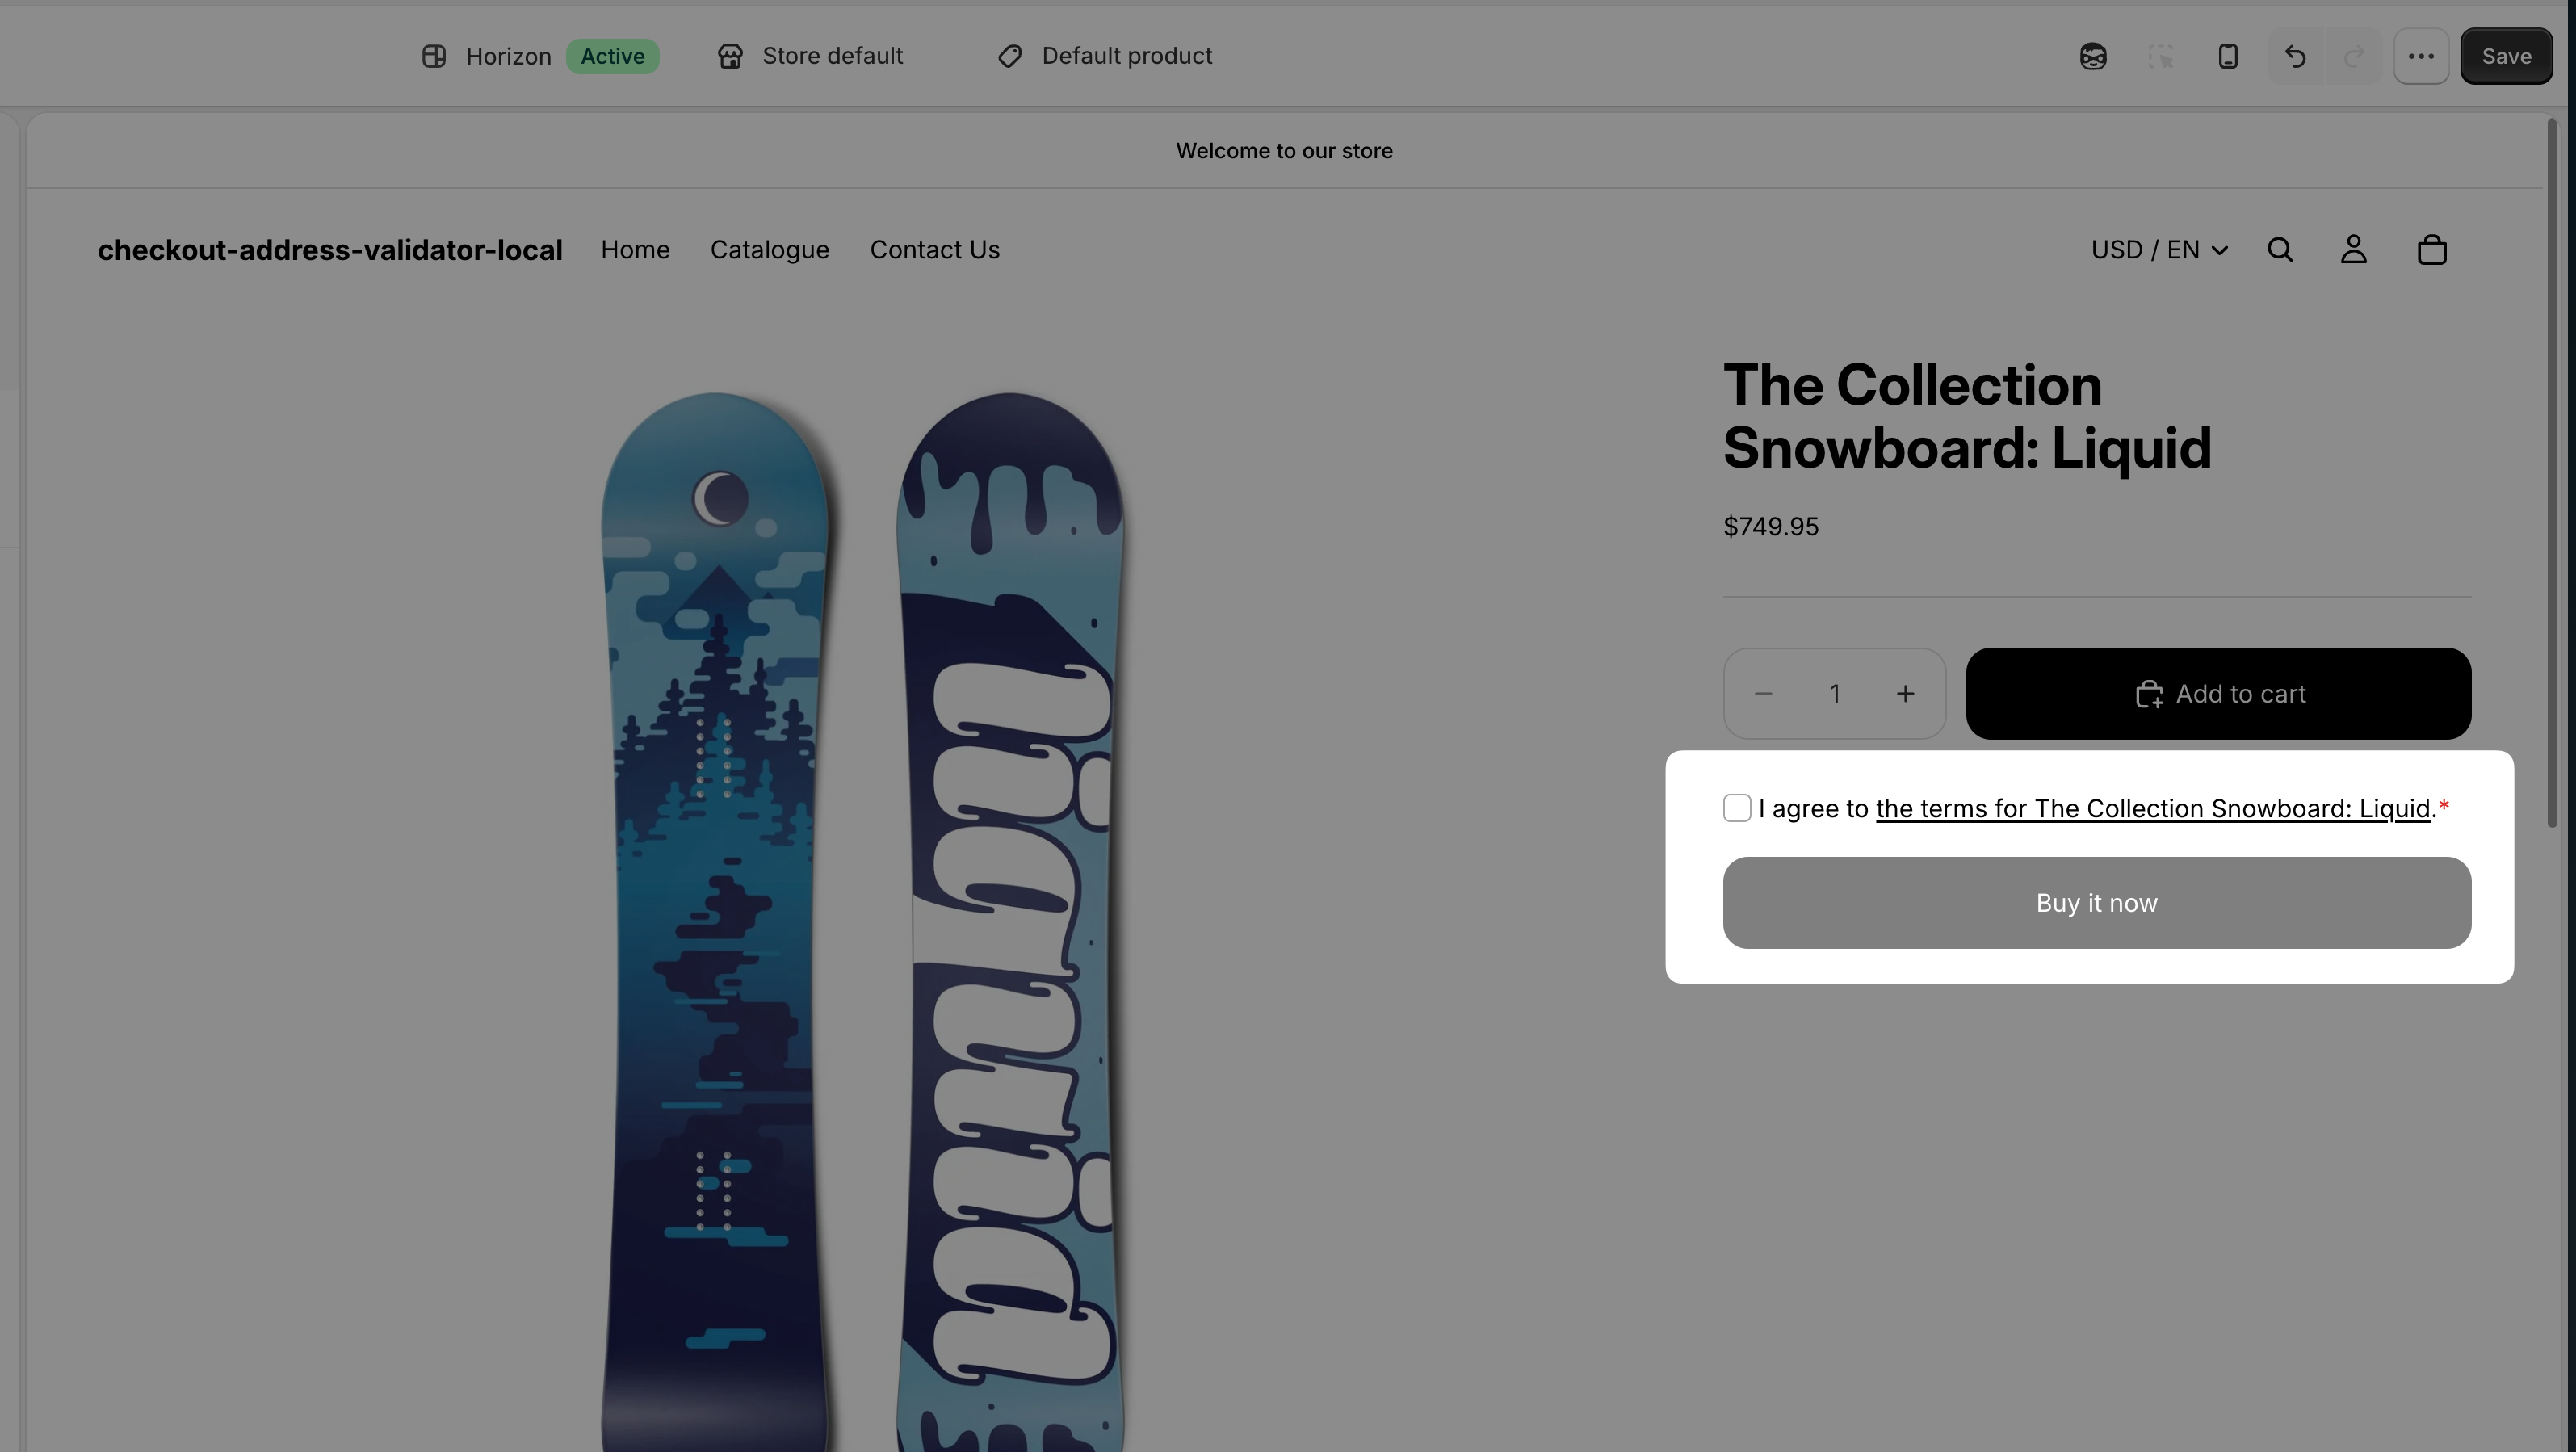
On a product page, only the checkboxes that match the product being viewed are shown. The page for product A shows only product A’s checkbox, and the page for product B shows only product B’s.
On the cart page and cart drawer, every checkbox that matches a product in the cart is shown, so if the cart contains both product A and product B, both checkboxes appear.
Once the display looks right in the Theme Editor, click Save at the top right of the Theme Editor to finish.
If the checkboxes do not appear as expected, please contact us via the chat at the bottom right of the app screen.