Worker guide: From login to completing a pick
A guide for warehouse staff using PickFlow. Log in from an invite link, open an assigned order, scan barcodes with your phone, and complete the pick.
This guide is for the people doing the picking. There is nothing to install.
Recommended: Chrome on your phone (both iPhone and Android). Avoid the browser built into chat apps such as LINE or Slack, which often cannot start the camera.
Before you start, get an invite link from your store admin. That is all you need.
1. First login: set your PIN
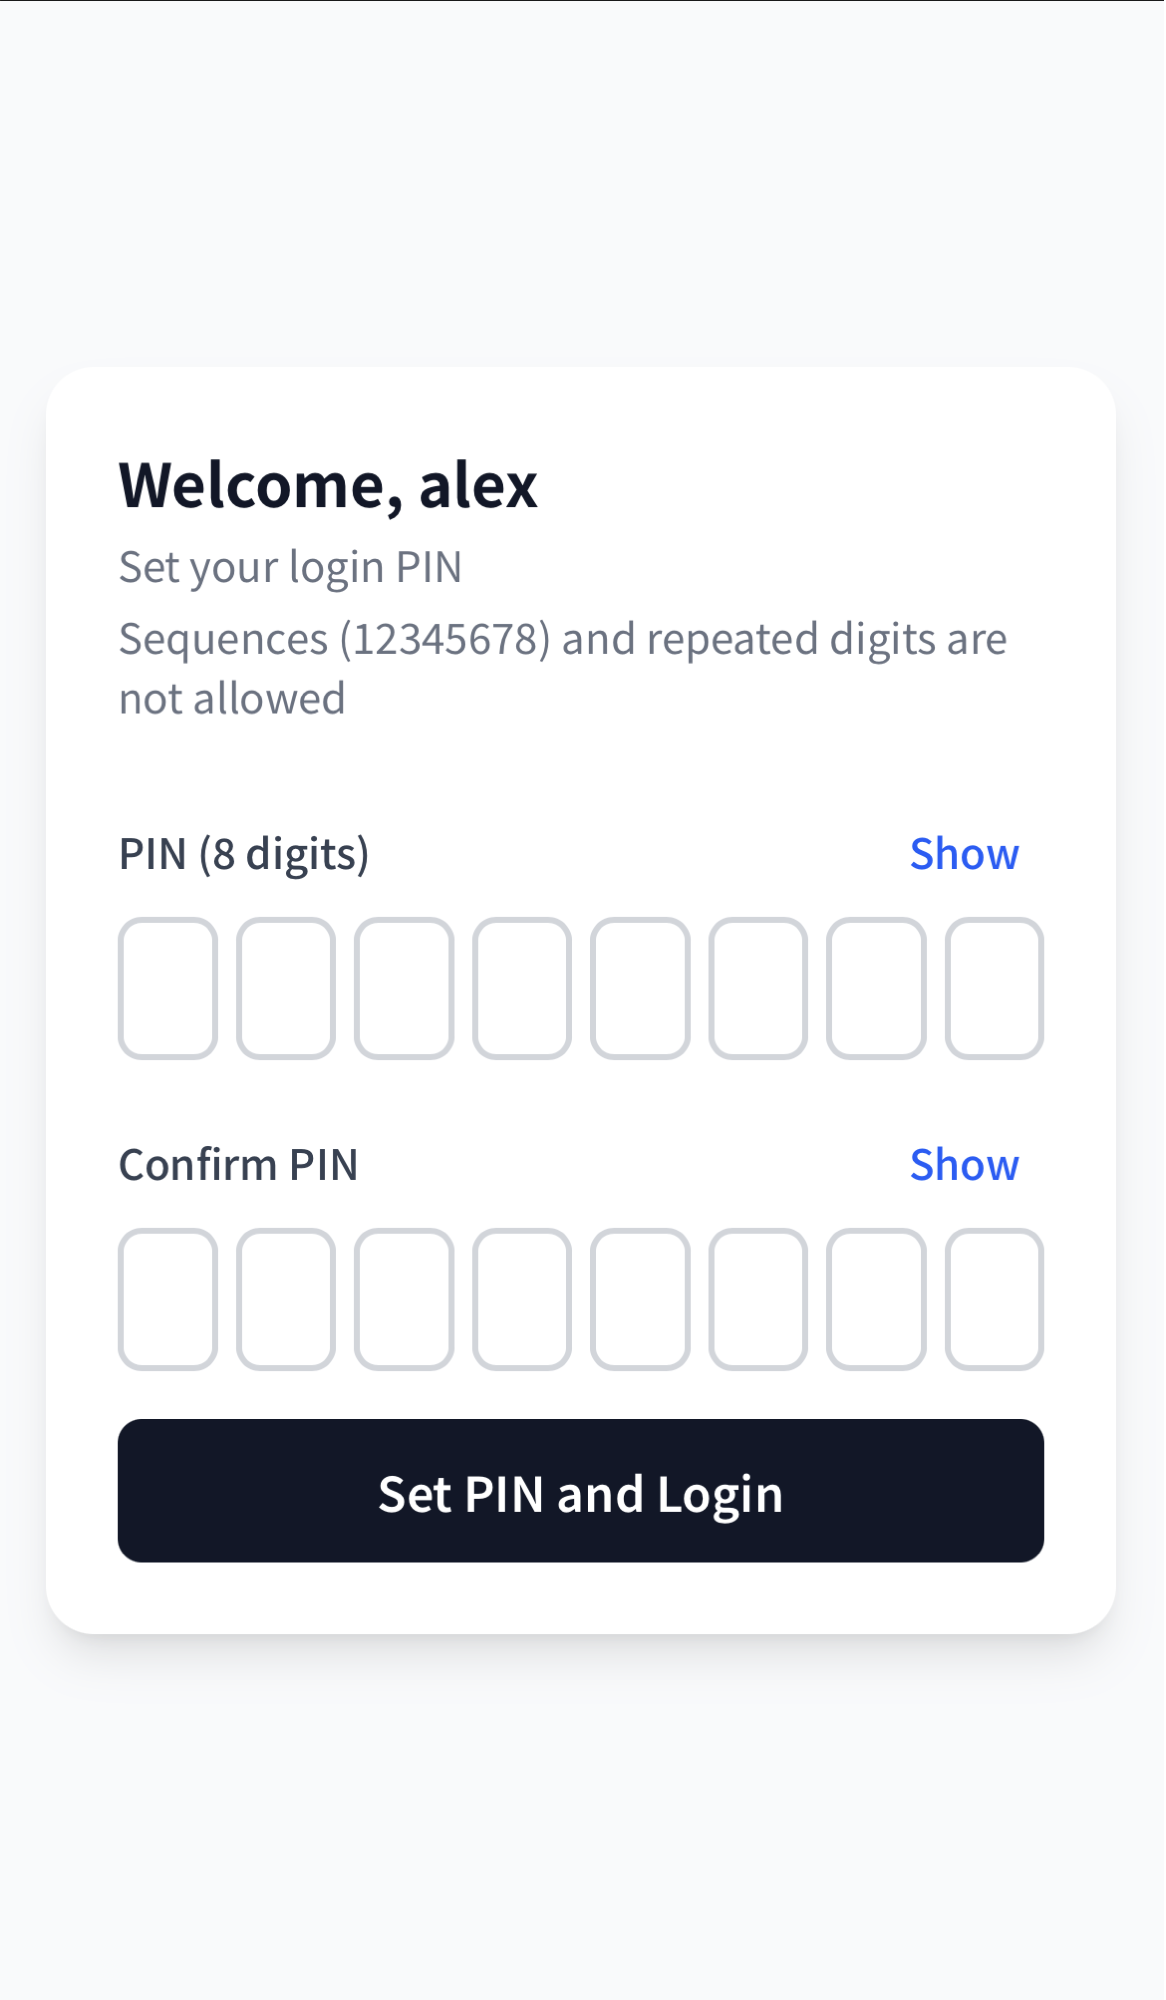
Opening the invite link in Chrome shows “Welcome, [your name]”. Enter an 8-digit numeric PIN twice, then press Set PIN and Login.
💡 If the link arrived in LINE or Slack, do not open it in that app’s built-in browser. Open it in Chrome instead, or the camera may not start when you pick. Long-press the link and choose “Open in Chrome,” or copy the URL and paste it into Chrome.
💡 Sequences (12345678) and repeated digits are rejected. Choose something you will remember but others cannot guess.
Setting the PIN logs you straight in to your order list. The invite link stops working once it has been used.
2. Opening it again later
As long as you use the same phone and the same browser, you stay logged in. Open Chrome and pick the page from your history, or open a bookmark you saved, and your order list is right there. You do not need another invite link.
After a long gap you may see a login screen. Either way you can get back in:
- If your name is shown, enter your PIN
- If it is not, enter your Worker ID (e.g.
alex) and PIN
💡 Adding the page to your home screen from the browser menu gives you a one-tap icon. On iPhone, though, opening it from the home screen may ask you to log in again. Ask your store admin for the login URL if that happens: an invite link stops working once it has been used, so it cannot be reused.
💡 Switching phones, or clearing your browser data, also logs you out. Again, ask your store admin for the login URL.
💡 Too many wrong PINs will lock your account. Wait about 15 minutes and try again, or ask your store admin to unlock it.
3. Open an order
The Orders tab shows only the orders assigned to you. Tap one to open it.
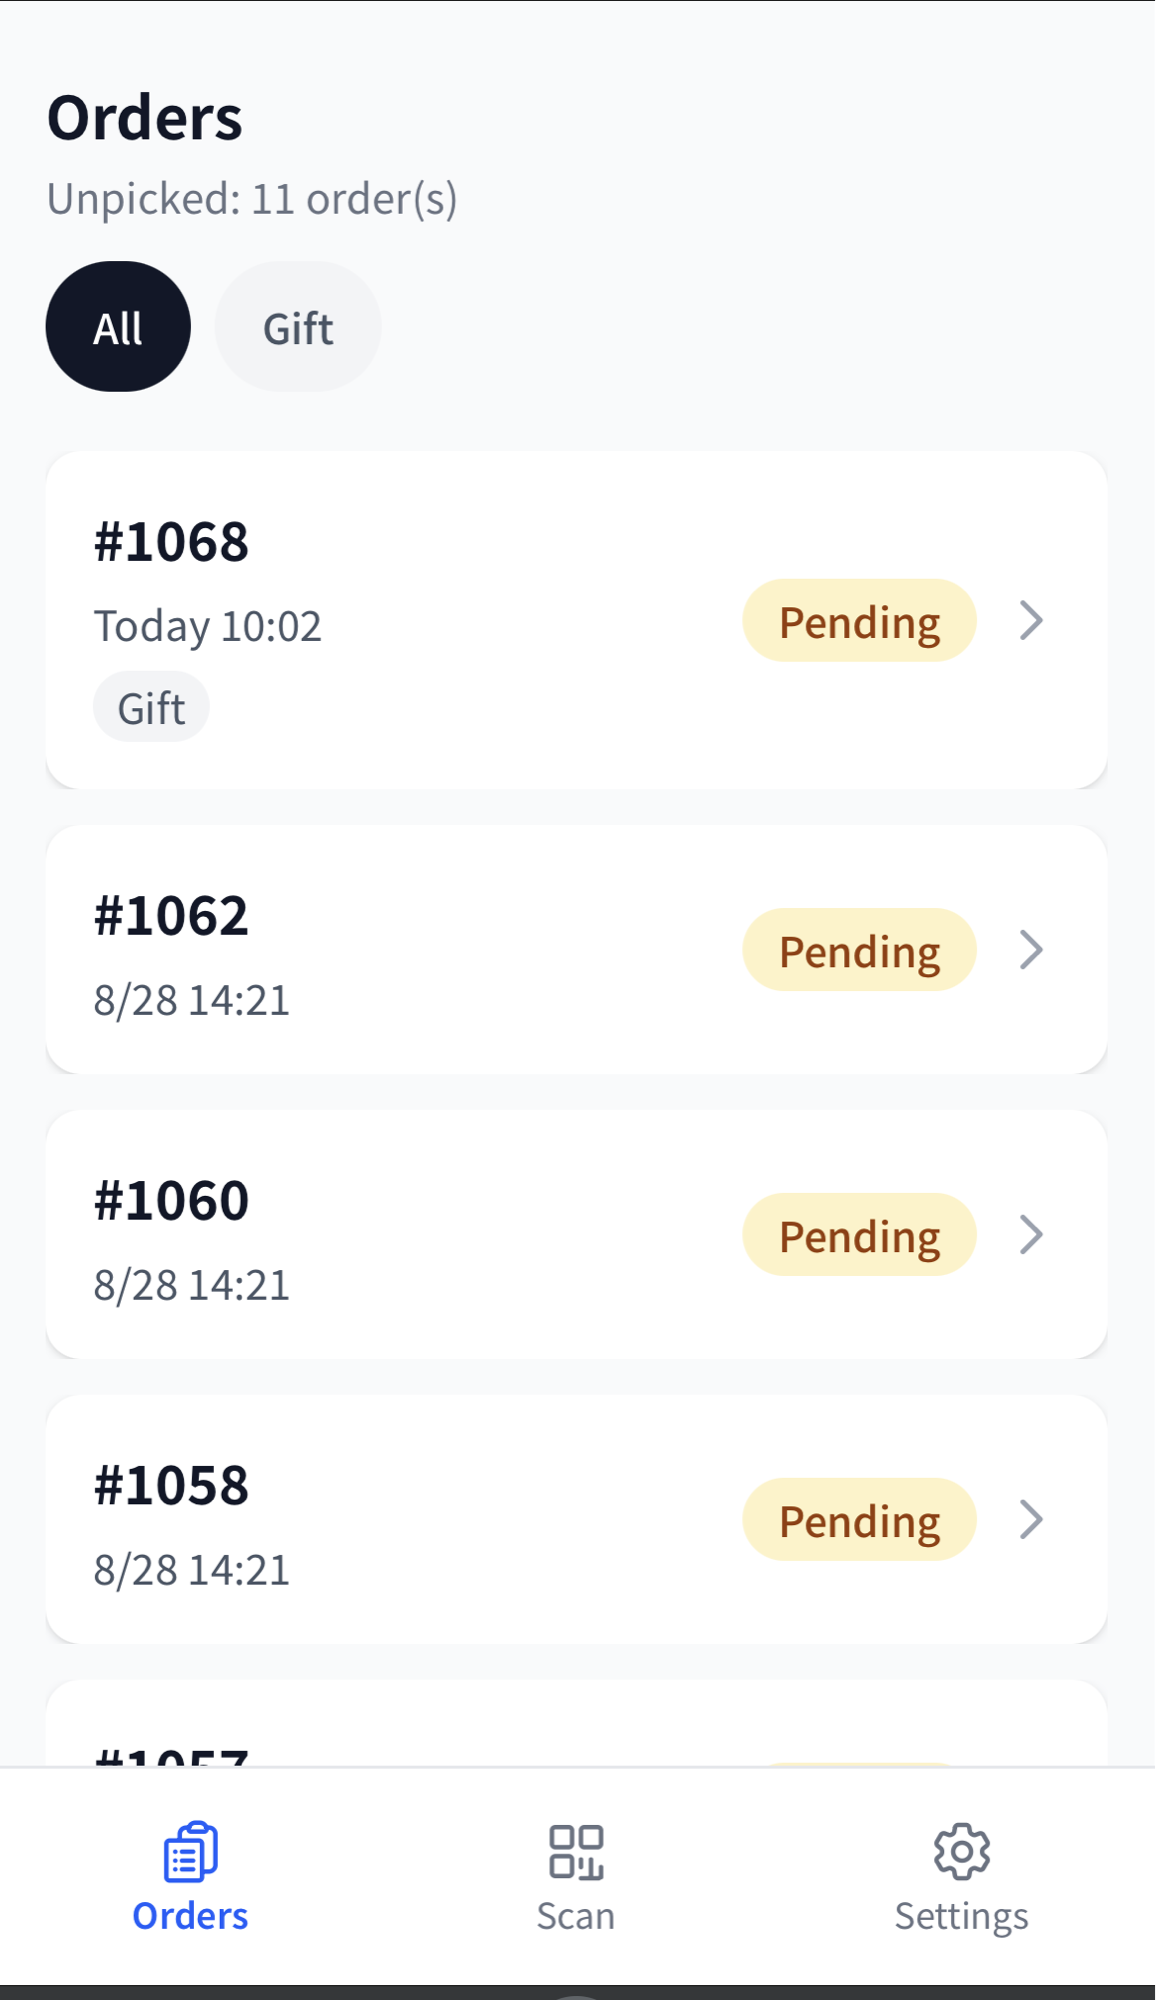
If the store tags its orders, chips appear under the title so you can narrow the list down to one kind of order.
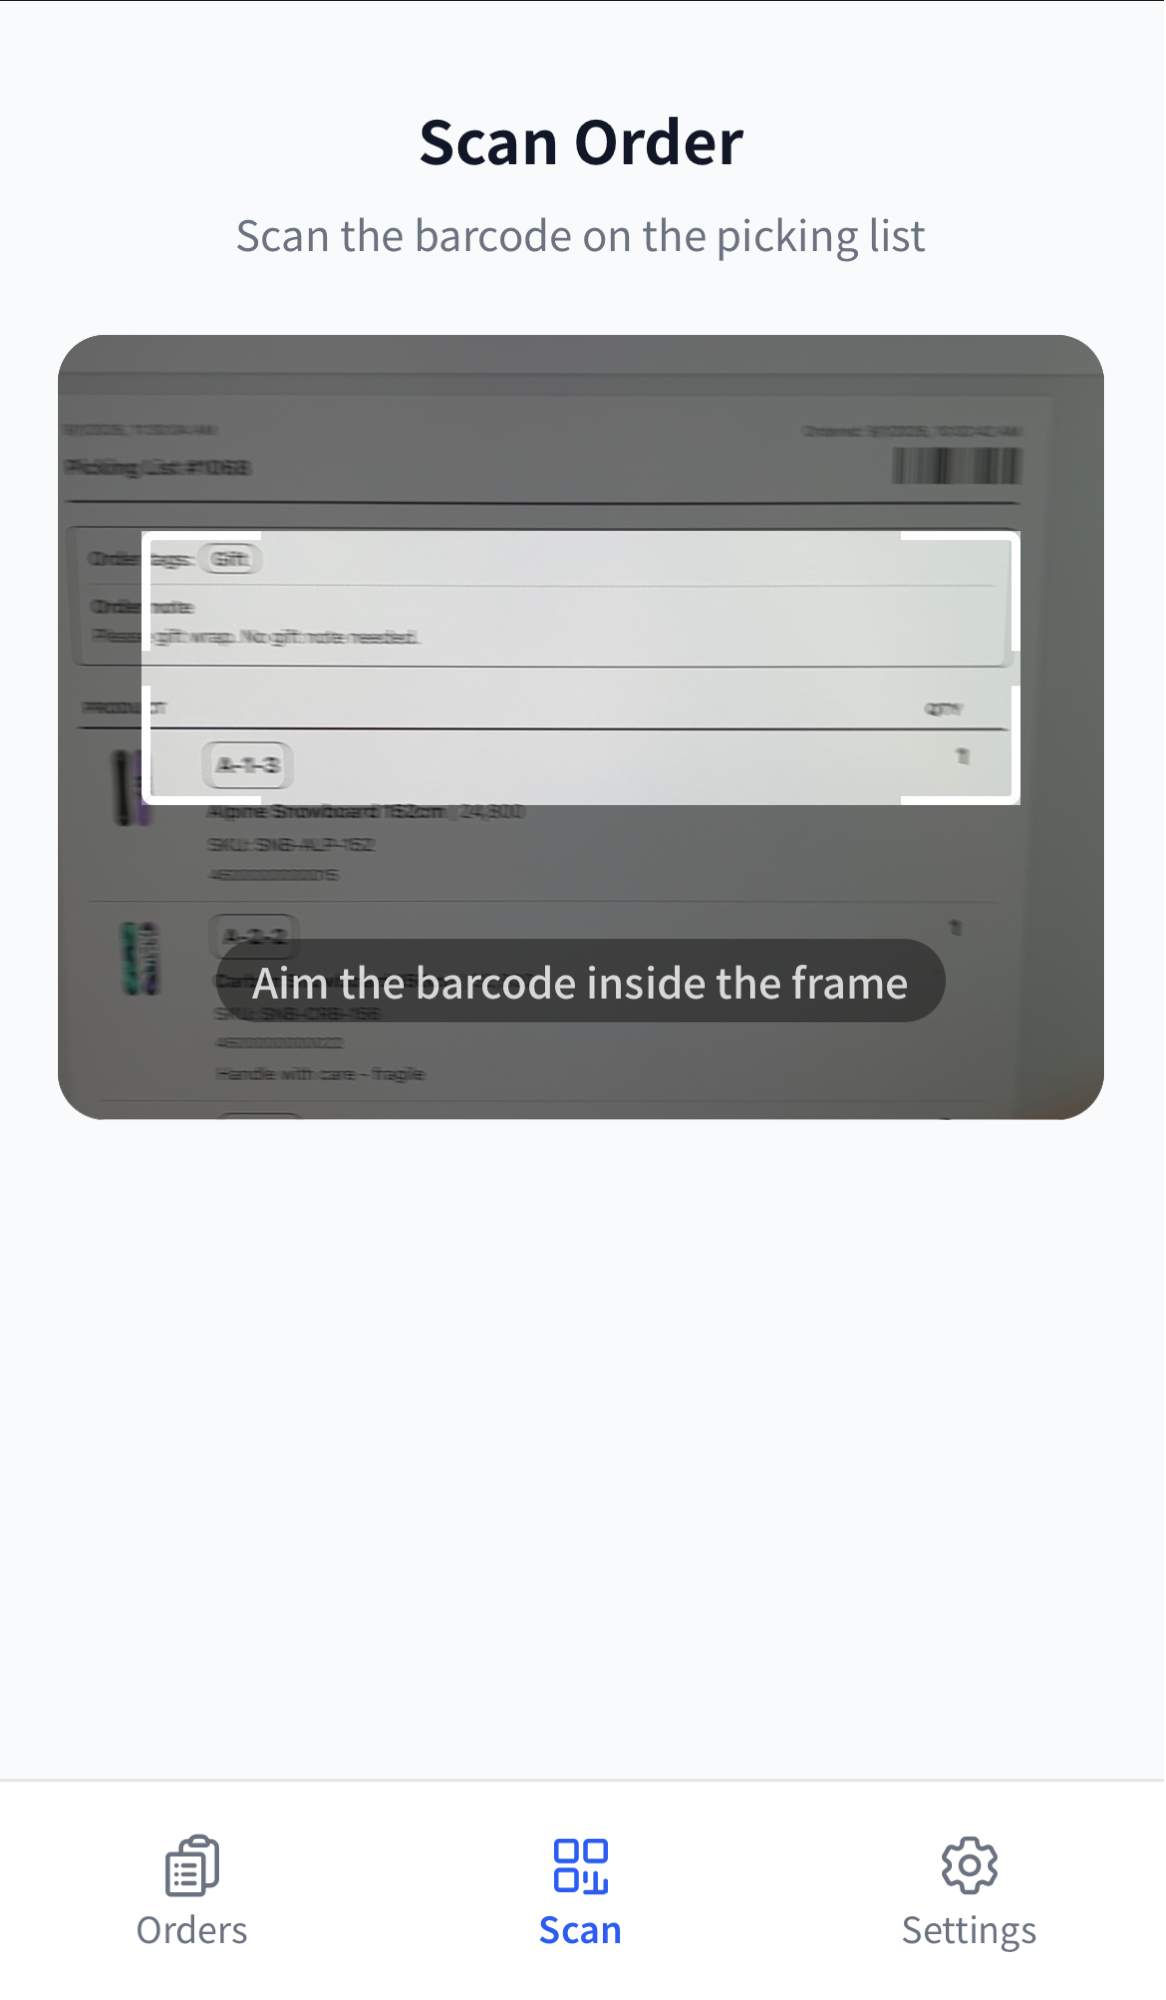
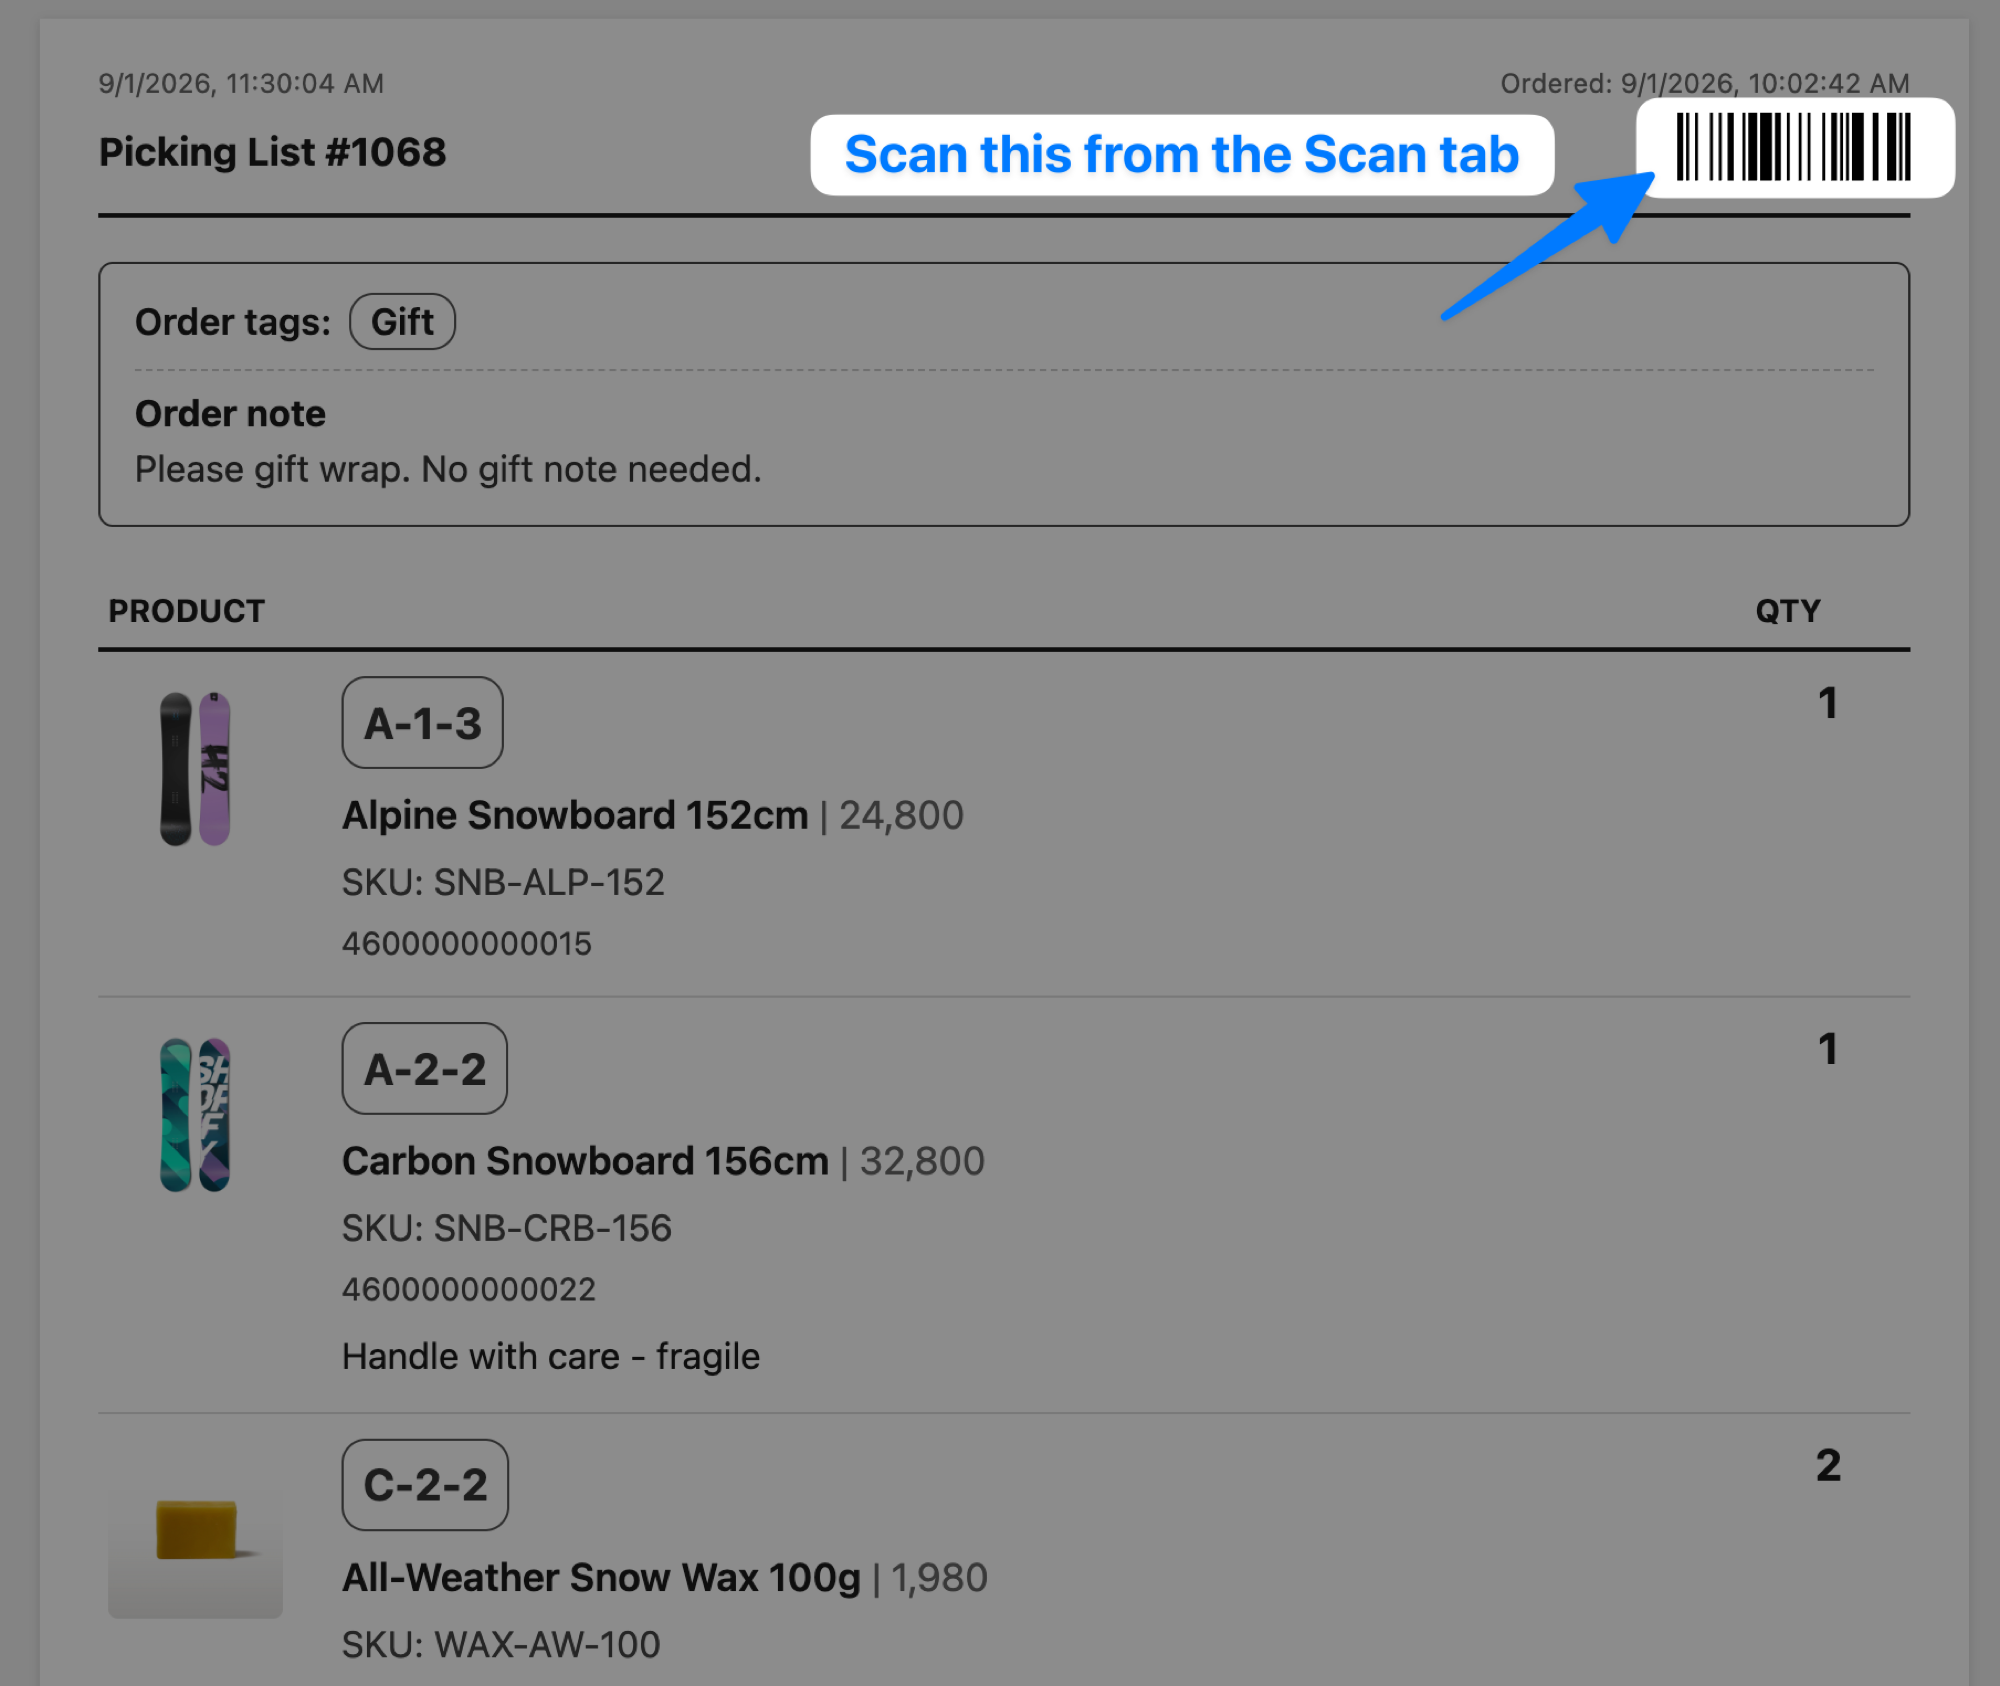
If you have a printed picking list in hand, use the Scan tab to read its order number barcode. Picking for that order starts right away and the item scan screen opens, with no need to find it in the list.
💡 If the order you need is not listed, it has not been assigned to you yet. Ask your store admin.
4. Review the items and start picking
The order screen shows each line item with its quantity, shelf location (e.g. Shelf: A-1-2), order note, and tags. When you are ready, press Start Picking.
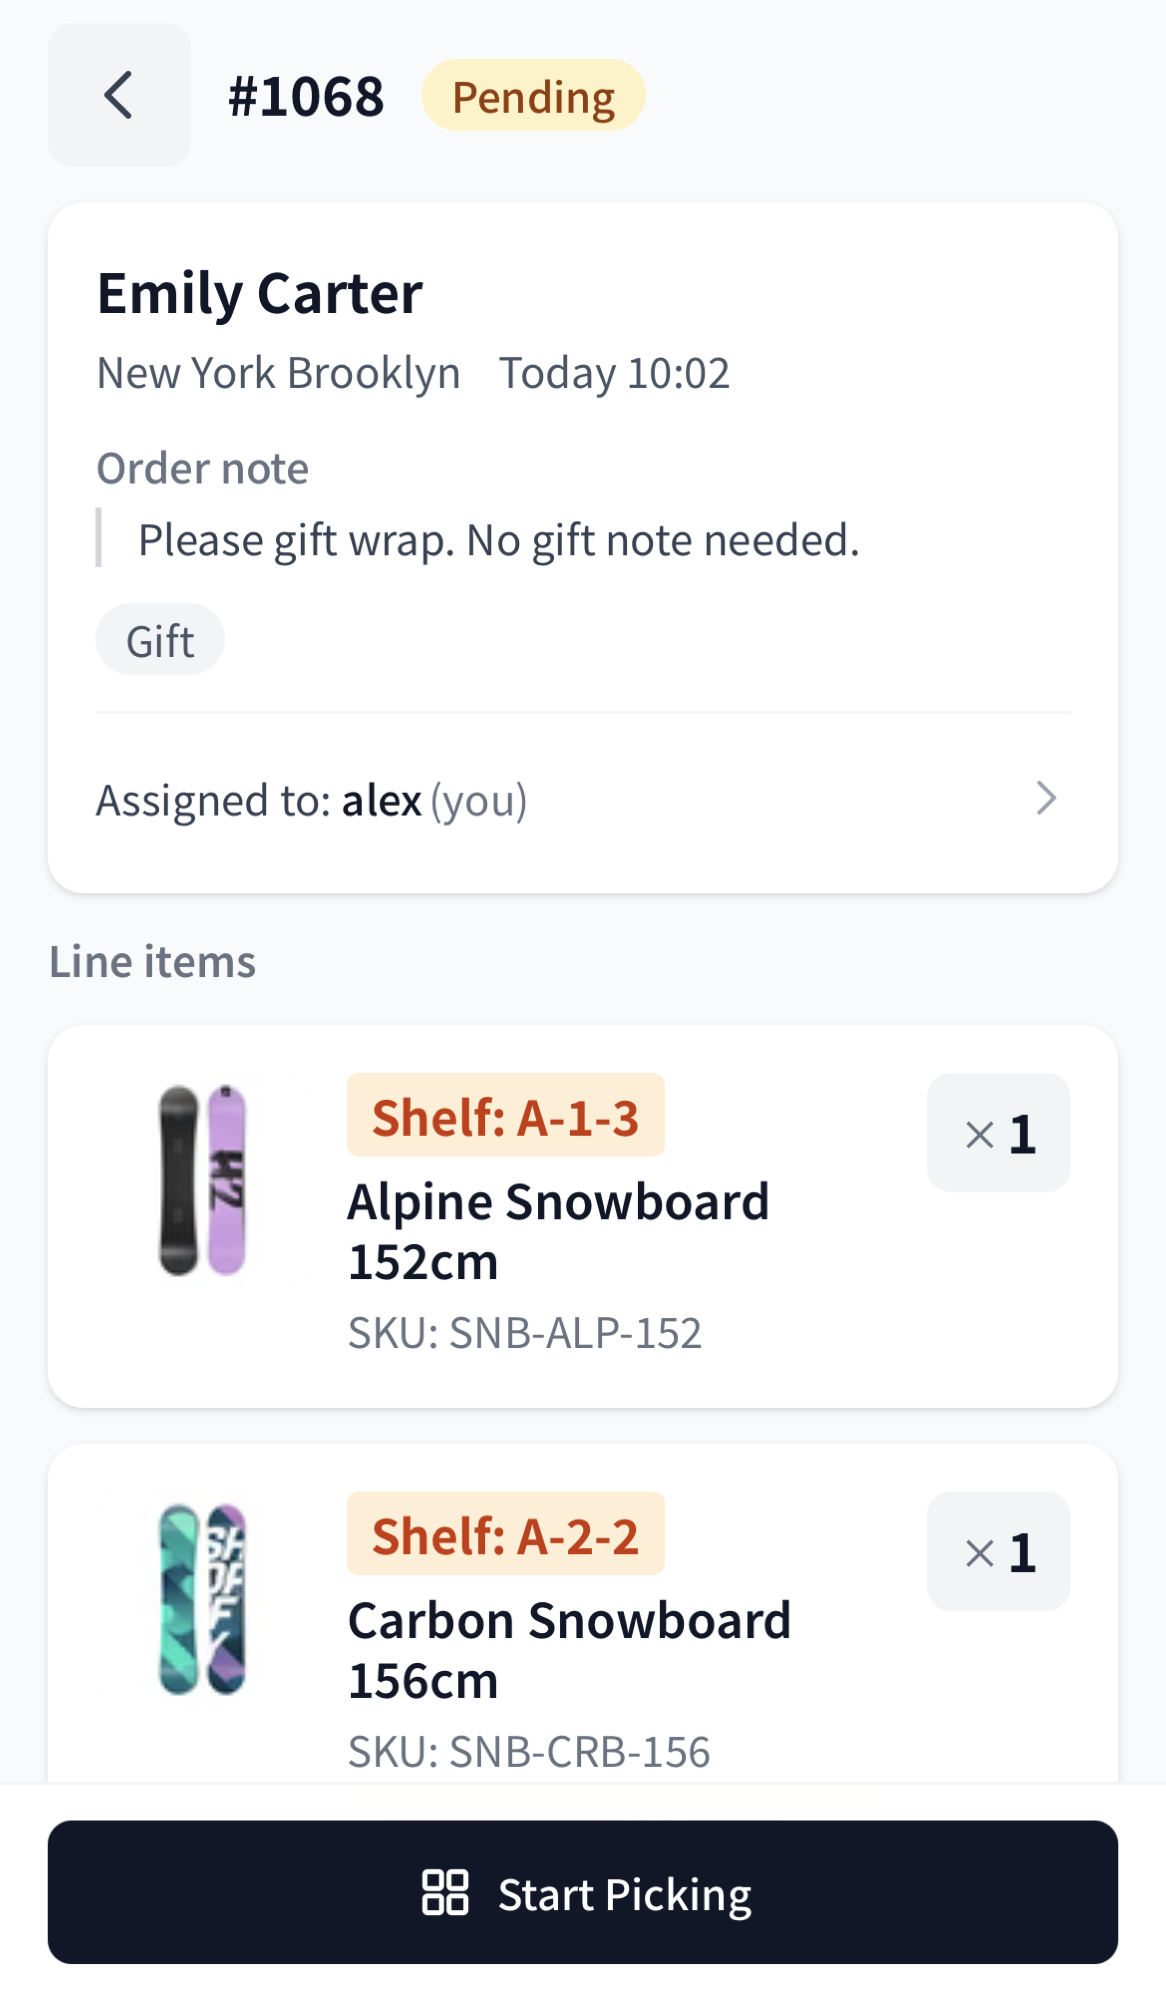
- If a product is stored in more than one place, several shelf badges appear side by side. Take it from whichever shelf you like.
- Bundles are expanded under “Bundle contents.” Collect each component individually.
- Items shipping separately are grouped under a heading of their own. They ship from another location, so do not pick them here.
5. Scan the barcodes
Start the camera and line the item’s barcode up inside the frame. Each successful read picks one unit and the progress counter at the top goes up (for example 3/8).
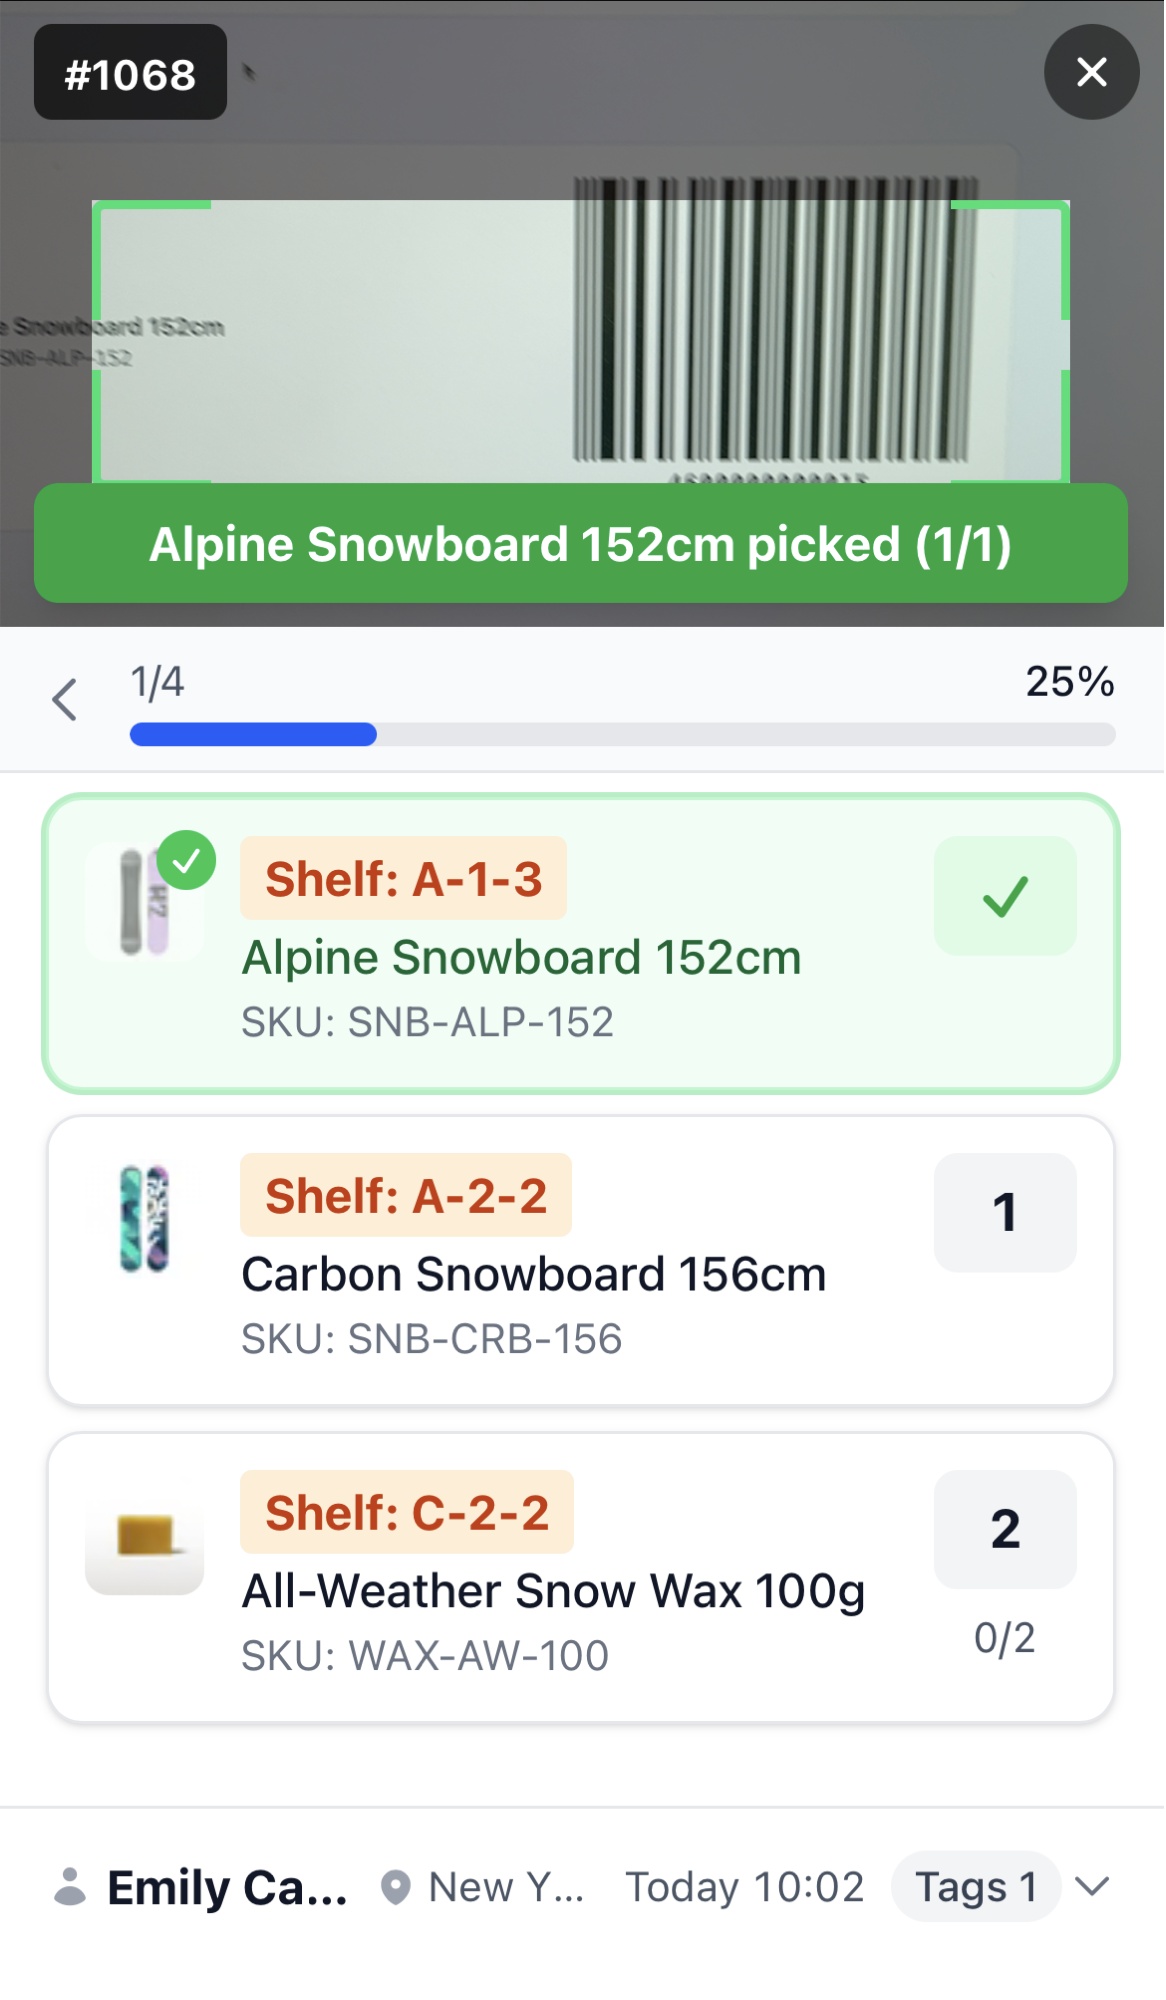
A few things that make the job faster:
- Picking several of the same item? Use Bulk add to enter a quantity at once, or All remaining to clear the rest of that line in one tap.
- Item labelled “Manual pick”? No scan needed. Press the Check button to confirm it. Your store admin sets this up for items without barcodes, and for ones whose barcodes are hard to read. Tell your admin if you find an item that will not scan.
- No scan sound? Check that sound effects are on in the Settings tab, then turn off silent mode and raise your phone’s volume.
6. Complete the pick
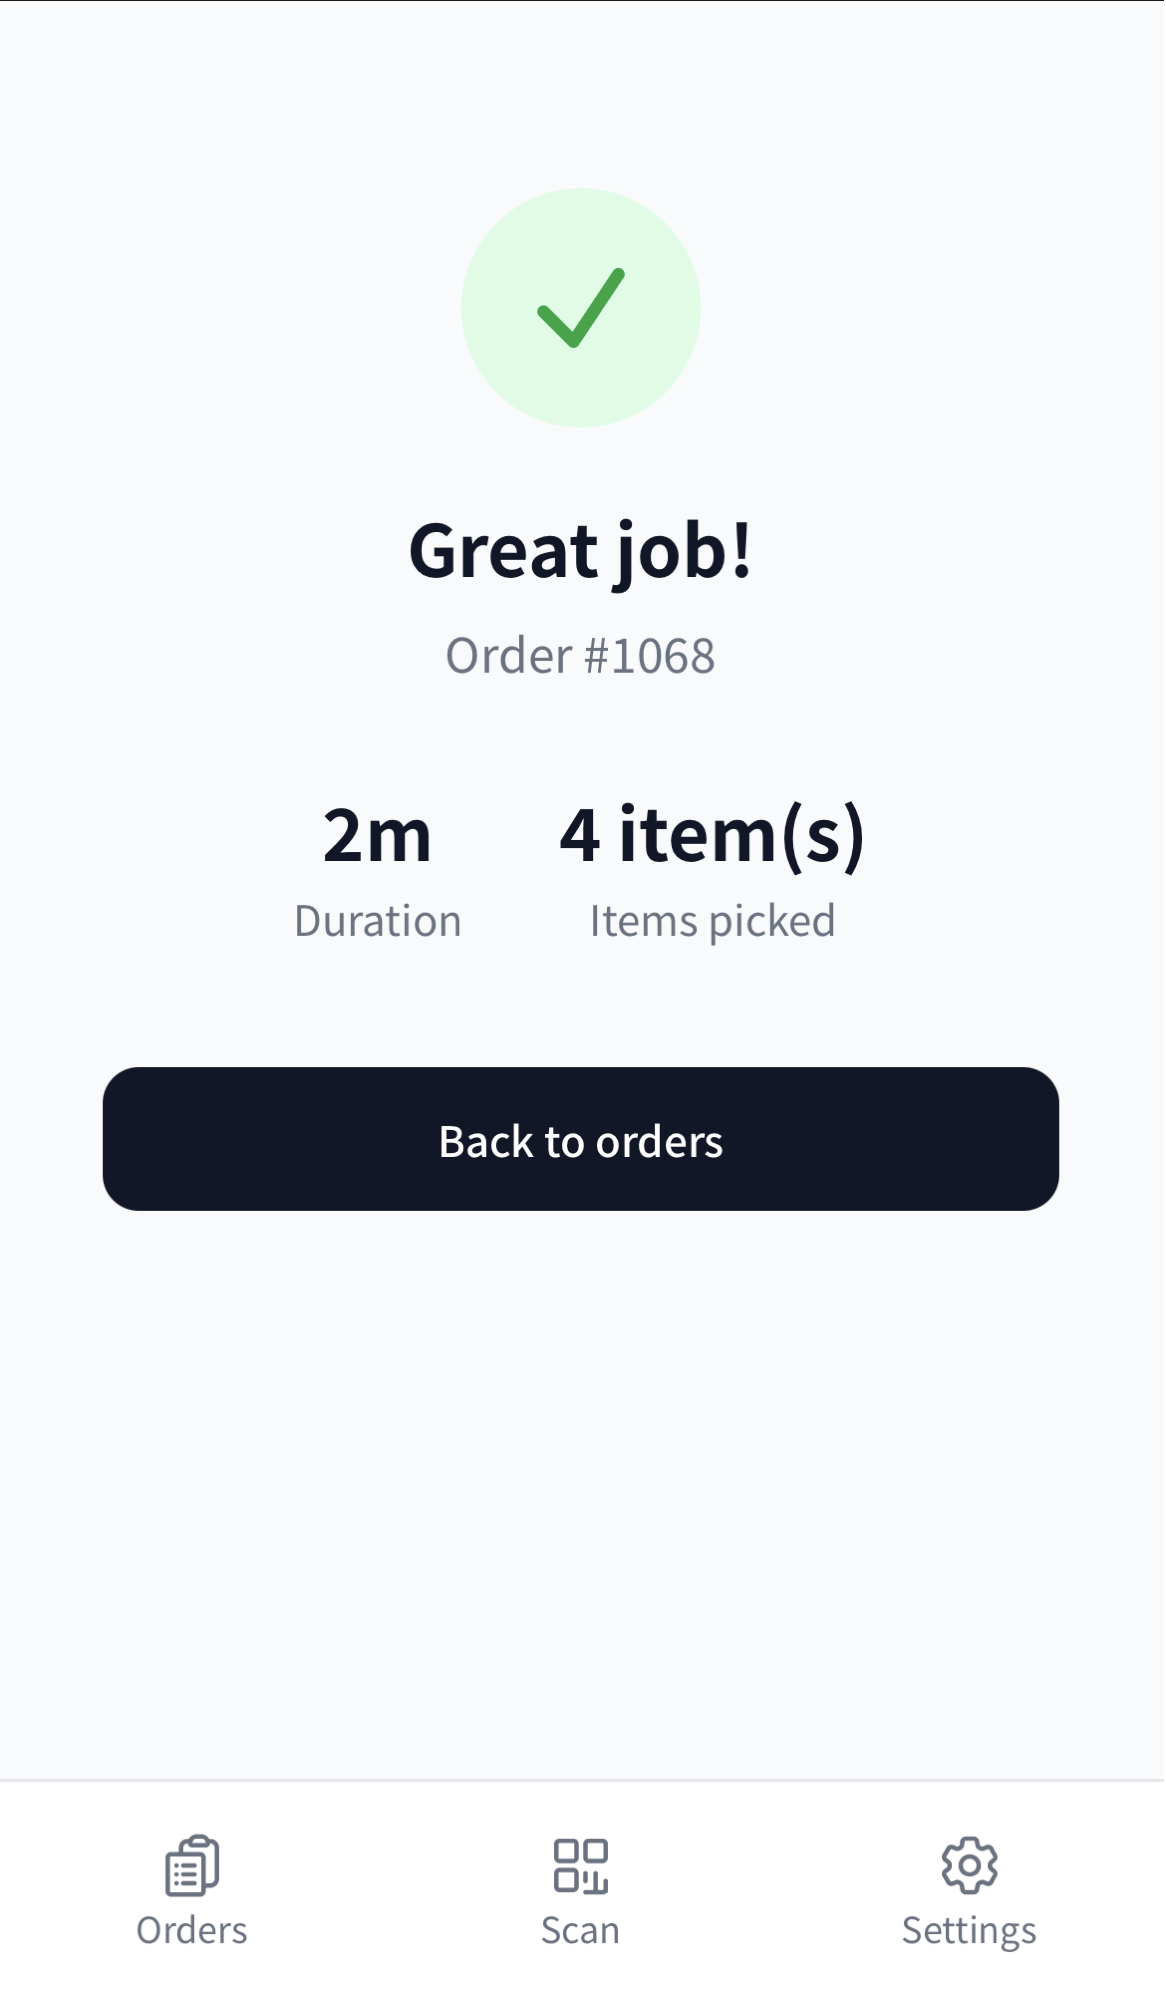
Once every item is picked, press the completion button. The summary screen shows your duration and how many items you picked. Use Back to orders to move on to the next one.
7. Troubleshooting
- The camera will not start: first check that you opened the app in Chrome. A chat app’s built-in browser often cannot use the camera. If you are in Chrome, allow camera access in its settings and close any other app using the camera before retrying. If that does not fix it, let your store admin know.
- The order was cancelled mid-pick: the screen tells you so. Stop picking that order.
- Someone else should take over: use Reassign on the order screen.
- Scanning says it is paused: the store has hit its monthly limit. You can still pick manually with the Check button on each item. Let your store admin know.
- Logging out: use Logout in the Settings tab.
Store admins can find the setup steps in Tutorial: From setup to your first pick.